
To patch a drywall hole like a pro, start by evaluating its size and gathering the right tools, such as a putty knife, drywall patch, and sanding sponge. Clean and sand the area for a smooth surface, then carefully apply your patch, making sure it’s secured and blended with the surrounding wall. Sand again for a seamless flare, prime, and paint to match. For expert tips and step-by-step guidance, keep exploring more.
Key Takeaways
- Assess the damage size to determine the appropriate patching method and necessary tools.
- Prepare the area by cleaning, sanding, and removing obstacles for a smooth repair surface.
- Use a drywall patch or mesh tape with joint compound for larger holes, ensuring proper placement and reinforcement.
- Sand the dried patch smoothly, then apply primer to hide the repair before painting.
- Match the paint color carefully, feather edges, and blend for a seamless, professional finish.

Drywall Repair Kit Drywall Hole Repair Patch Kits Wall Spackle Repair Paste with 8.5OZ White Wall Repair Putty with Scraper, Wall Surface Hole Fill Quick and Easy Solution (1Pack)
Complete Repair Kit: Contains 1 pieces repair putty(8.5oz), 2 inch wall repair patches(2pcs), 4 inch wall repair patches(1pcs),…
As an affiliate, we earn on qualifying purchases.
As an affiliate, we earn on qualifying purchases.
Assess the Damage: Is the Hole Small or Large?
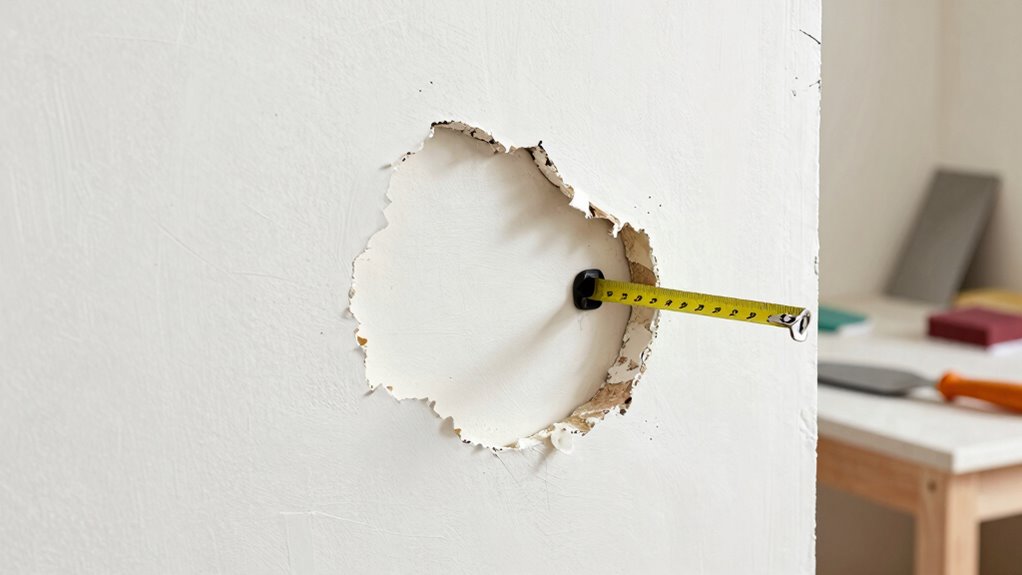
How can you tell if the hole in your drywall is small or large? First, observe the size and shape. Small holes, like nail or screw holes, are usually less than a quarter-inch wide and may only affect the drywall’s surface. Larger gaps or holes, such as those caused by accidents or removals, can be several inches across and expose the wall’s inner structure. Check if the drywall texture around the hole matches the rest of the wall; irregular textures may indicate a larger area of damage. For bigger holes, wall reinforcement becomes essential to support the patch and prevent future cracking. Small holes often need simple patching, but larger damage requires a more thorough assessment of the drywall’s integrity before proceeding.

DAP DryDex Lightweight Low Dust Joint Compound, Pink/White, 1 Gal (7079810120)
Ideal for smooth, high quality finishing of gypsum panel joints, nail heads and metal corner beads
As an affiliate, we earn on qualifying purchases.
As an affiliate, we earn on qualifying purchases.
Gather Your Tools and Materials for Drywall Repair
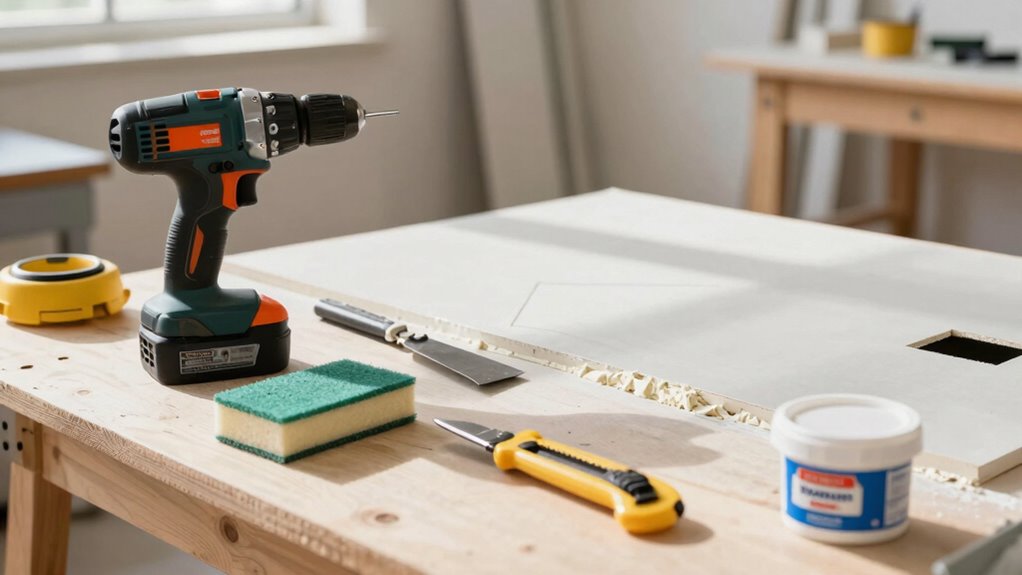
To successfully repair drywall, you need to gather the right tools and materials beforehand. Start with essential tools like a putty knife, drywall saw, sanding sponge, and a utility knife. Make certain tool safety by handling blades carefully and storing sharp tools securely to prevent accidents. You’ll also need materials such as joint compound, drywall patch or repair kit, primer, and paint matching your wall color. Keep all supplies organized in a designated area to streamline your work process. Proper material storage prevents damage and keeps everything accessible. Double-check that you have everything before starting to avoid interruptions. Having your tools safe and your materials ready sets a solid foundation for a smooth, professional-looking drywall repair. Proper preparation is key to ensuring a seamless repair process and a professional finish.

Romeda 8-Pack Sanding Sponge, Four Grits Per Pack 60/80/120/220, Washable and Reusable Handmade Sandpaper Block, Drywall Sandpaper Blocks for Wooden Drywall Sheetrock and Metal Glazing
【ASSORTED GRIT SANDING BLOCKS】 8 sand blocks, 4 sizes from coarse to ultra-fine sand, 60/80/120/220 grit, 2 blocks…
As an affiliate, we earn on qualifying purchases.
As an affiliate, we earn on qualifying purchases.
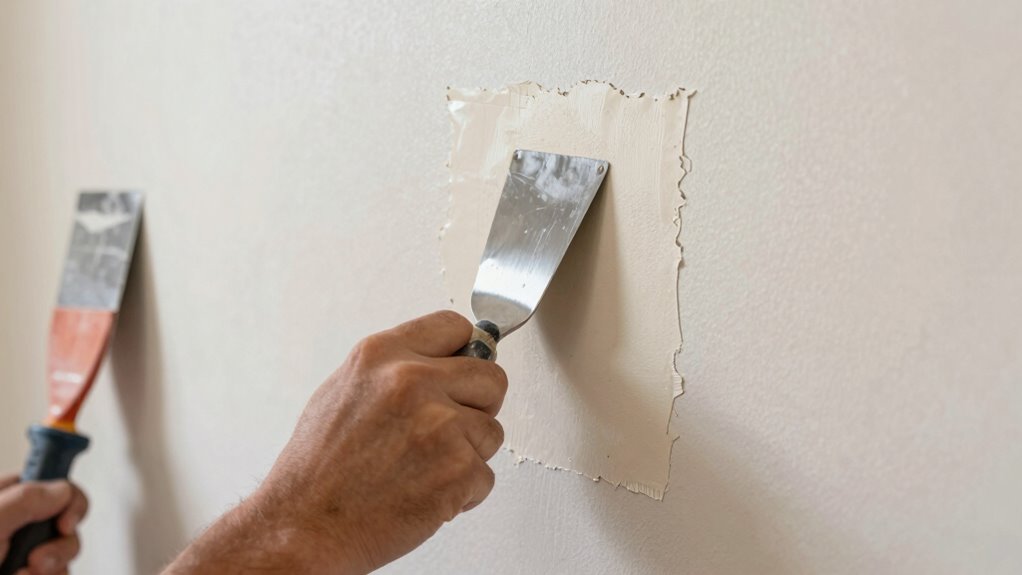
Prepare the Area and Sand for a Smooth Finish
Before you begin sanding, clear the area of any furniture, decorations, or obstacles to guarantee a safe and unobstructed workspace. Once clear, gently sand the patched area using fine-grit sandpaper to smooth out uneven edges and blend the repair with the existing wall texture. Focus on maintaining moisture control, as excessive moisture can cause the drywall compound to soften or crack, compromising your finish. Lightly feather the edges to create a seamless gradation between the patch and the surrounding wall. Be careful not to over-sand, which can damage the drywall surface or remove the repair. A smooth, even surface is essential for achieving a professional-looking finish and preparing the wall for painting or additional texture work. Additionally, ensuring proper color accuracy during finishing can help match the repaired area with the existing wall color for an undetectable repair.

Rerdeim 5Pcs Putty Knife, Set, 1" 2" 3" 4" 5" Scraper, Spackle Knife, Paint Scraper, Scraper Tool, No Rusting, Perfect For Repairing Drywall, Removing Wallpaper, Mud, Plaster Scraping
【Multipurpose】5pcs Spackling Knives Different Sizes Are Available, Perfect for Putty, Wallpaper, Applique, Backing, Repair, Paint, Plaster, Including Drywall,…
As an affiliate, we earn on qualifying purchases.
As an affiliate, we earn on qualifying purchases.
Choose the Right Patch Method Based on Your Hole
When selecting a patch method, consider the size and shape of your hole. Small holes often only need simple patch kits, while larger or irregular repairs require more extensive solutions. Choosing the right approach guarantees your repair is durable and seamless.
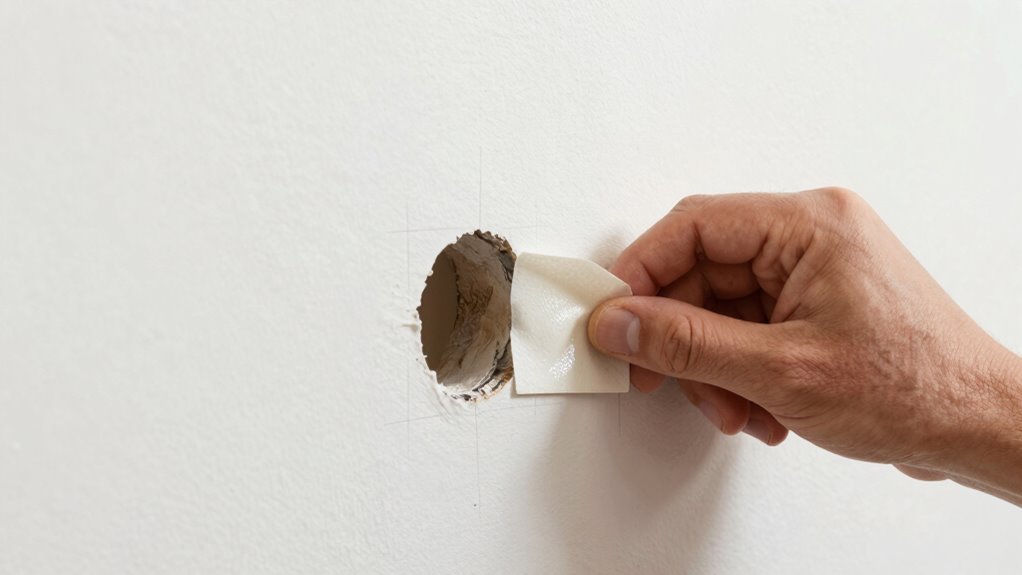
Small Hole Solutions
Small holes in drywall are common and easy to fix once you choose the right patch method. For tiny holes, like nail or screw holes, a simple spackle or joint compound with a putty knife usually does the trick. If you want a seamless look, consider texture matching to blend the repair with the existing wall surface. Be mindful of moisture issues; if the hole is near a bathroom or kitchen, ensure the area is dry before patching to prevent mold growth. For very small holes, a self-adhesive patch or even a small piece of mesh tape covered with compound can work well. These quick fixes save time and help your wall look smooth and uniform, no matter the size of the hole. Proper patching techniques also help maintain the wall’s integrity and prevent future damage.
Large or Irregular Repairs
Large or irregular holes in drywall require selecting the right patch method to guarantee a strong, smooth repair. For bigger or uneven damage, a drywall patch or mesh tape combined with joint compound often works best. If the hole has an irregular shape, cut a piece of drywall to fit precisely, then secure it with screws. To guarantee your repair blends seamlessly, focus on texture matching by sanding and feathering the edges carefully. Moisture prevention is also critical; if the hole is near a moisture source, use a mold-resistant patch or sealant before applying joint compound. Properly matching the texture and sealing against moisture will help your repair last longer and look professional, preventing future problems and maintaining the integrity of your wall. Additionally, understanding home safety tips for households can help you identify potential hazards that may cause drywall damage in the future.
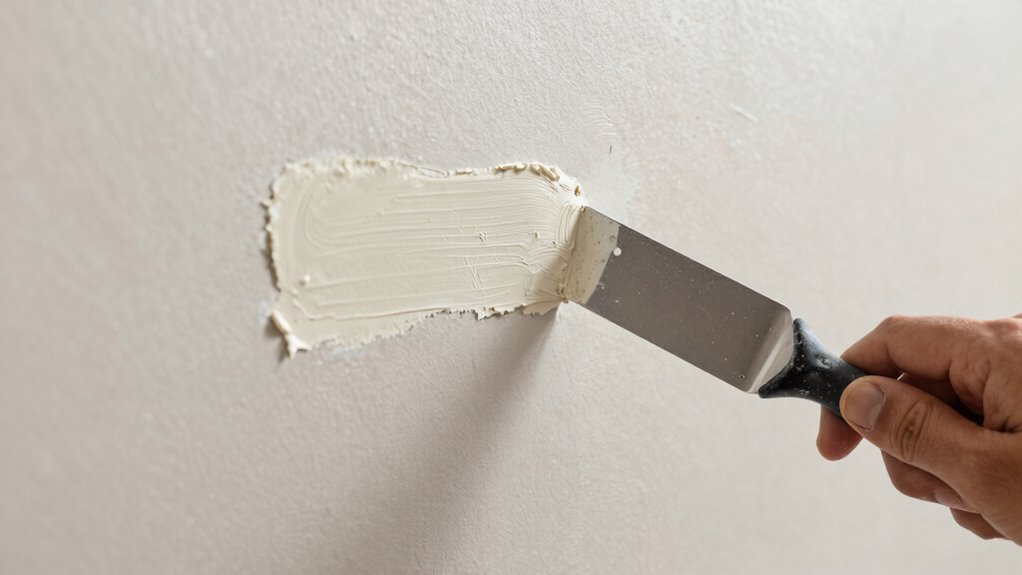
Apply and Secure the Drywall Patch Properly
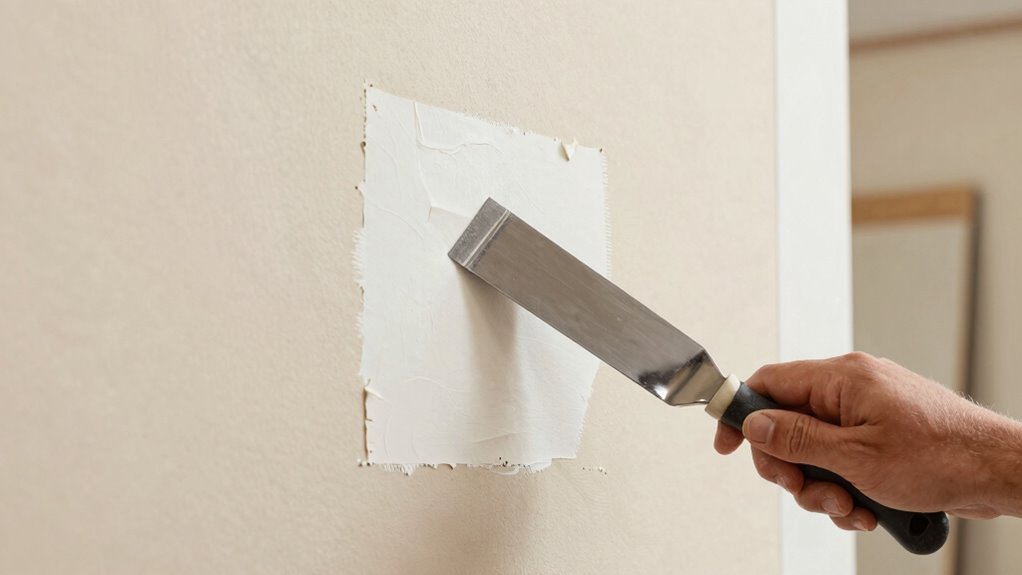
To guarantee a secure and seamless repair, you should carefully position the drywall patch over the prepared area and press it firmly into place. Confirm the patch aligns with existing drywall textures for a consistent look. Use drywall screws or nails to secure the patch, particularly around the edges, for added wall reinforcement. Proper attachment prevents future cracks or movement. Consider the following factors:
| Step | Method | Tips |
|---|---|---|
| Positioning | Center patch over hole | Keep textures aligned |
| Securing | Fasten with drywall screws | Use enough screws without overdriving |
| Reinforcement | Apply joint tape underneath | Strengthens bond, prevents cracks |
| Texture Matching | Adjust patch edges slightly | Pre-match textures for blending |
This approach ensures the patch stays secure and blends smoothly with your existing drywall.
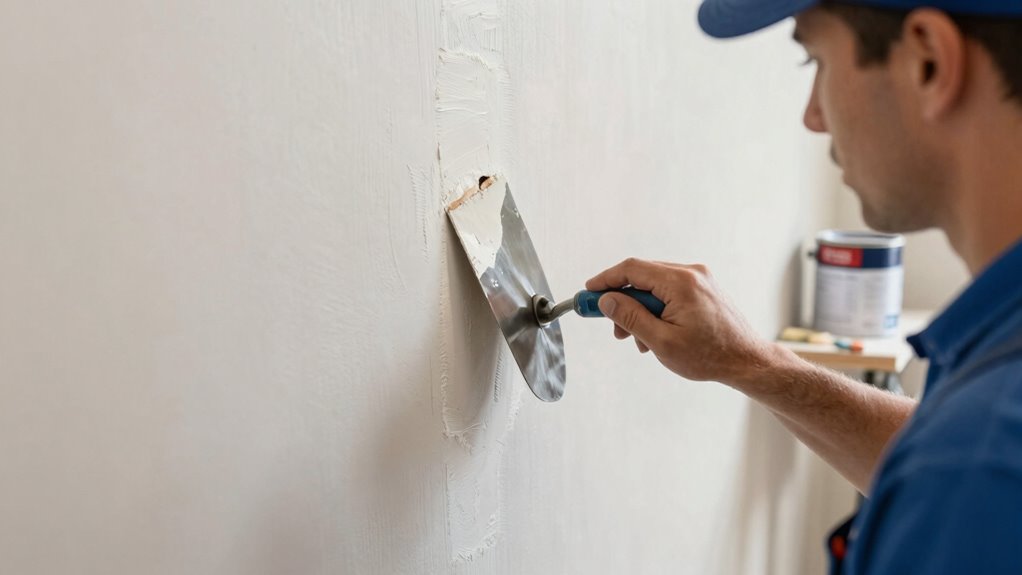
Sand and Smooth the Repaired Area for a Seamless Look

Once the patch is securely in place and the joint compound has dried, it’s time to sand and smooth the area to achieve a seamless finish. Use fine-grit sandpaper to gently sand the patch and surrounding drywall, removing excess compound and leveling the surface. Be careful to blend the repaired area into the existing wall texture; if your wall has a textured finish, lightly feather the edges to match the original wall texture. Keep your movements light to avoid damaging the patch or creating gouges. Wipe away dust with a damp cloth before inspecting your work. The goal is a smooth, even surface that blends seamlessly with the rest of the wall, setting a perfect foundation for priming and painting. Additionally, considering the use of joint compound with strong adhesion can help ensure a durable, professional-looking repair.
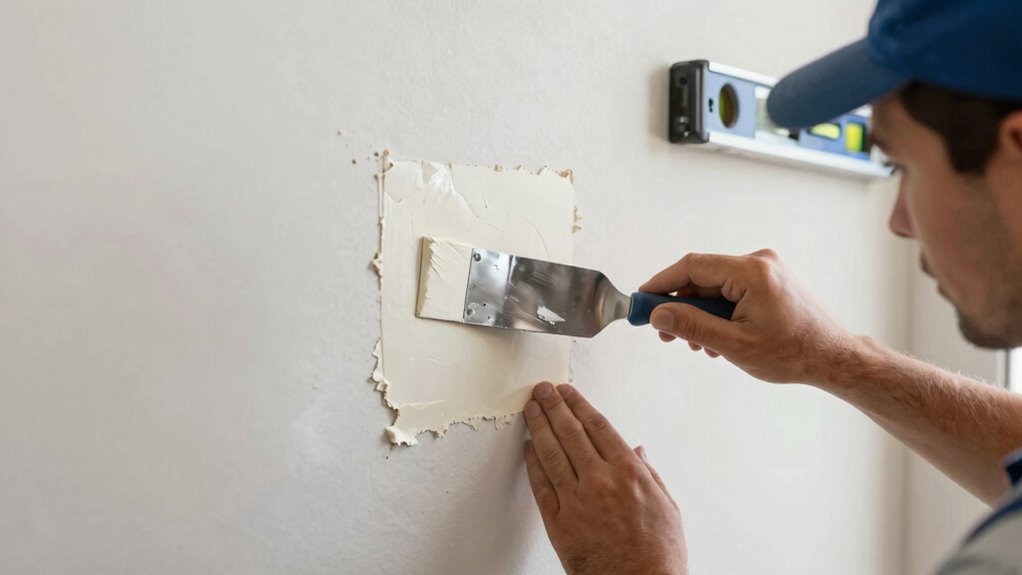
Prime and Paint to Match Your Walls
To guarantee your patch blends perfectly, choosing the right primer is essential. It helps hide repair areas and prepares the surface for a smooth paint finish. When blending your paint, use a color-matching technique to achieve a seamless look that matches your walls exactly. Additionally, ensure proper humidity control during painting to prevent issues like bubbling or peeling.
Choosing the Right Primer
Have you chosen the right primer to guarantee your drywall repair blends seamlessly with the existing wall? Primer selection is vital because it ensures the patched area accepts paint evenly and prevents mismatched textures. For paint matching, select a primer that closely matches your wall’s color and finish—whether it’s matte, eggshell, or satin. If your wall has a dark or vibrant color, opt for a tinted primer to help reduce the number of paint coats needed. A high-quality primer also helps seal the patch and provides a smooth base for the topcoat. Take your time choosing the right primer to avoid uneven color or sheen discrepancies once you paint. Proper primer selection makes your repair nearly invisible and gives your wall a professional finish. Additionally, understanding Free Floating concepts can help you better plan and execute your drywall projects for a flawless outcome.
Blending Paint for Seamless Finish
Wondering how to make your patch blend seamlessly with the rest of the wall? The key is effective color matching and paint blending. Start by selecting a paint color that closely matches your wall. If you’re unsure, test a small amount on a hidden section first. When applying paint, use a light hand and feather the edges of your patch into the surrounding wall to avoid harsh lines. Mix your paint thoroughly to ensure consistent color, and consider adding a bit of water or a blending medium if needed. Multiple thin coats work better than one thick coat, helping the patch fade smoothly into the existing paint. With careful color matching and smooth paint blending, your repair will be virtually invisible, leaving your wall looking flawless. Additionally, proper lighting can help you better assess the color match and blending quality during the process.
Common Mistakes to Watch Out For When Patching Drywall
One of the most common mistakes when patching drywall is failing to prepare the surface properly. Skipping cleaning or sanding can cause uneven textures and weak bonds. Ignoring wall reinforcement may lead to cracks or sagging over time. Also, neglecting to match drywall texture can result in an obvious repair. To avoid these issues, focus on thoroughly preparing the area, ensuring proper reinforcement, and blending textures seamlessly. Use the table below to understand key considerations:
| Mistake | Solution |
|---|---|
| Not cleaning the surface | Clean dust and debris before patching |
| Overlooking wall reinforcement | Add reinforcement for extra support |
| Ignoring drywall texture | Match texture for a seamless finish |
Additionally, incorporating proper texture blending techniques can greatly improve the appearance of your repair. Pay attention to these points to ensure a durable, invisible patch.
Tips to Prevent Future Damage and Maintain Your Walls
To prevent future damage and keep your walls looking their best, regular maintenance is essential. Start by inspecting your walls for cracks, peeling paint, or signs of moisture, and address issues promptly. To maintain wall texture, avoid harsh cleaning methods that can strip paint or damage the surface. Moisture prevention is key—use dehumidifiers in damp areas and fix leaks immediately to prevent mold and structural issues. Applying a protective sealant can also help preserve your drywall and prevent water infiltration. Keep furniture and fixtures properly secured to avoid accidental dents or punctures. Regularly cleaning your walls with gentle methods maintains their appearance and extends their lifespan. Taking these steps ensures your walls stay durable, attractive, and free from preventable damage.
Frequently Asked Questions
Can I Patch a Hole Without Removing Damaged Drywall?
Yes, you can patch a hole without removing damaged drywall. For drywall repair, use patching techniques like applying a self-adhesive mesh patch or joint compound over the damaged area. Sand it smooth once dry, then paint to blend with your wall. This method saves time and keeps your wall intact, making it a practical solution for small to medium holes without the need for extensive drywall removal.
How Do I Match the Paint Color After Patching?
To match the paint color after patching, start by testing your existing paint in a hidden area. Use color matching or paint blending techniques to blend the new paint with the surrounding wall. Apply small amounts, gradually building up, and compare it under different lighting. If needed, mix a custom color to seamlessly blend the patch, ensuring the repair stays invisible and your wall looks perfect.
What Are the Best Types of Drywall Patches for Large Holes?
For large holes, consider using a mesh or self-adhesive drywall patch for effective drywall repair. Mesh patches provide strength and flexibility, making patching techniques easier for bigger damages. You can also cut a piece of drywall to fit the hole and secure it with joint compound and tape. These patches guarantee a smooth surface, allowing you to sand and paint seamlessly after patching, restoring your wall’s integrity and appearance.
How Long Should I Wait Before Painting After Patching?
You should wait at least 24 hours before painting after patching drywall to ensure it’s completely dry. This drying time might feel like an eternity, but it’s vital for a smooth, professional finish. Use drywall repair tips like sanding and priming to prepare your surface properly. Rushing the process can lead to peeling or cracking, so patience now means flawless painting results later.
Is It Necessary to Use Primer Before Painting Over the Patch?
Yes, you should use primer before painting over your patch. Primer application helps seal the patched area, ensuring better paint adhesion and a smooth finish. It also prevents the patched spot from absorbing paint differently, which can affect paint matching. Applying primer gives you a uniform surface, making sure your paint color blends seamlessly with the rest of the wall. This step provides a professional, long-lasting result.
Conclusion
By following these steps, you’ll be able to patch your drywall like a pro. For instance, imagine fixing a late-night hole from a falling picture frame—you’ll save time and money while keeping your walls flawless. With patience and the right technique, your walls will look seamless again. Just remember, avoiding common mistakes and taking your time guarantees a professional finish every time. Soon, you’ll confidently tackle drywall repairs and restore your space effortlessly.