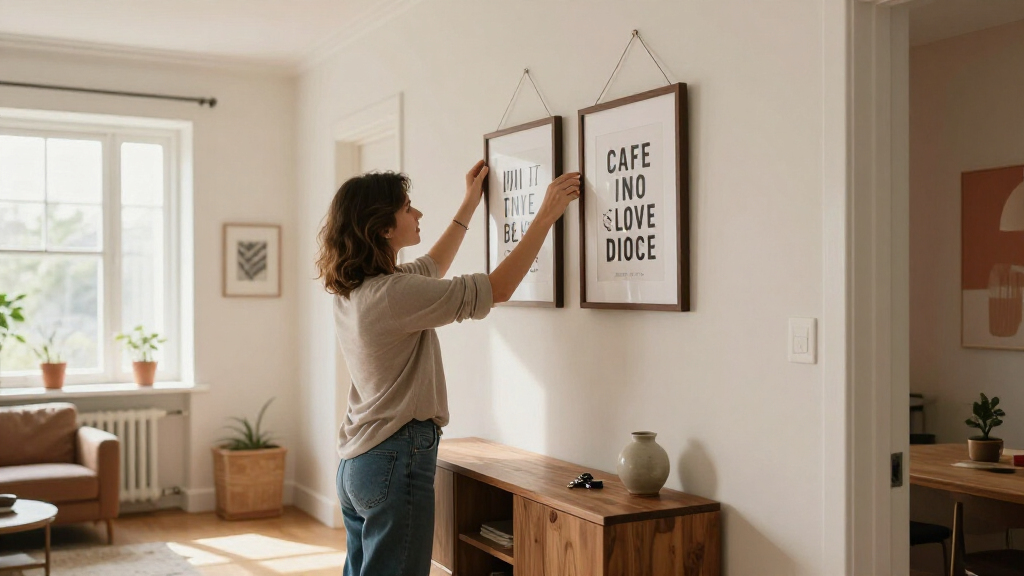
Create motivational quote wall art by choosing a message, designing it for a specific wall, then printing or making and hanging the finished piece. This guide is for beginners who want a polished result without special art skills. Plan on 1–3 hours of hands-on work, depending on whether you use a ready-made frame, create a digital design, or paint by hand. You will finish with a piece that is readable from across the room and mounted at a comfortable viewing height.

Get the little things that make your day delivered free with Prime
- Fast, free delivery on millions of items
- Prime Video, Amazon Music and more included
- Member-only deals all year

DSHFG Motivational Inspirational Wall Art Prints, Set of 4
- ✔ Quantity: 4 prints
- ✔ Print size: 8×10 inches each
- ✔ Framed: No; unframed

Outus 9 Inspirational Wall Art Prints, 8×10 Inch, Unframed
- ✔ Quantity: 9 prints and 40 adhesive dots
- ✔ Print size: 8×10 inches each
- ✔ Material: Card stock with double-sided lamination

Benziso Motivational Metal Wall Art – Inspirational Positive Quotes Wall Decor
- ✔ Quantity: 1 piece
- ✔ Material: Powder-coated iron
- ✔ Color: Black
Difficulty: Beginner | Time: 1–3 hours, plus drying time if painting
What You’ll Need
Tools & Materials:
- Paper and pencil for measuring and sketching
- A computer, tablet, or phone with a design app, or paper and art supplies for a hand-lettered version
- Printer and suitable paper, or access to a print shop
- Frame, poster hanger, or other chosen display method
- Ruler or tape measure
- Pencil, level, and picture-hanging hardware suited to the wall
Knowledge:
- Basic measuring and cutting
- Basic use of a design app, or willingness to draw or paint by hand
- How to use wall hardware safely
Set aside enough time to review the wording and layout before printing or painting. Check the wall surface and the weight of the finished piece before choosing hooks or adhesive strips. For a rental or freshly painted wall, check the mounting product instructions and paint curing guidance before attaching anything.
DSHFG Motivational Inspirational Wall Art Prints, Set of 4
For a motivational display that feels planned without requiring nine separate messages, DSHFG’s four-print set is our strongest all-around choice. Each unframed print measures 8×10 inches and uses modern black-and-white typography, a restrained look that can sit comfortably in an office, dorm, classroom, or bedroom. Compared with Outus, it offers fewer prints, but that can make a small wall easier to arrange without crowding it. The shared minimalist treatment also gives the four pieces a consistent visual role.The main limitation is the same one buyers face with Outus: there are no frames, and the listing specifies only one size. We will need to supply frames or choose another mounting method, and we cannot mix sizes within the set for a more varied gallery effect. Compared with Benziso, DSHFG delivers several messages rather than one metal phrase, but its printed format is less suited to a spot where moisture or outdoor exposure matters. Pick it when a simple, matched group is the goal; skip it if we want a ready-to-hang piece or substantial material.
Pros:
- Four prints create a coordinated display with several messages.
- Minimal black-and-white typography suits many interiors.
- 8×10-inch format fits standard-size frames.
- Described for offices, dorms, classrooms, bedrooms, and study spaces.
Cons:
- Unframed, so display requires separate frames or another mounting method.
- All four prints are limited to 8×10 inches.
- Printed paper format is not described for outdoor use.
Best for: Buyers furnishing a home office, study area, dorm, or classroom who want four matching motivational prints.
Not ideal for: Anyone seeking framed art, mixed print sizes, a large nine-piece display, or a durable outdoor sign.
Bottom line: We recommend DSHFG for a balanced, coordinated motivational display when four unframed 8×10 prints are the right scale.
“We recommend DSHFG for a balanced, coordinated motivational display when four unframed 8×10 prints are the right scale.”
Outus 9 Inspirational Wall Art Prints, 8×10 Inch, Unframed
When we want motivational words to cover more wall area, Outus offers the broadest selection in this lineup: nine 8×10-inch prints plus 40 adhesive dots. The dots provide a direct mounting option, while the standard-size prints can also go into frames. That makes the set more adaptable at setup than DSHFG, whose supplied details do not name a mounting accessory. The laminated card stock is described as sturdy, reusable, and odorless, a useful combination for displays that may be rearranged.More pieces bring more choices, but they also ask us to plan a larger arrangement. All prints share the same size and a black-and-white typographic treatment, so buyers who prefer varied formats or a more colorful wall may find the collection visually uniform. Like DSHFG, Outus is unframed and limited to 8×10 inches; adhesive dots solve one mounting need, not the desire for a polished framed finish. Compared with Benziso, it offers a range of messages and more coverage, but it lacks the metal sign’s stated outdoor suitability. Choose it for a classroom, office, or room where nine coordinated reminders will be useful.
Pros:
- Nine prints offer more messages and greater display coverage than either alternative.
- Includes 40 adhesive dots for direct mounting.
- Double-sided laminated card stock is described as sturdy and reusable.
- Can also be displayed in standard 8×10 frames.
Cons:
- All prints are the same 8×10-inch size.
- Unframed; adhesive dots may not suit every desired finish or wall.
- Nine pieces require more arrangement and wall space than DSHFG’s four.
Best for: Teachers, students, or office owners who want a larger arrangement and value included adhesive mounting dots.
Not ideal for: Buyers who want a framed finish, mixed dimensions, color variety, or one substantial metal focal point.
Bottom line: We choose Outus when quantity and flexible mounting matter more than varied sizes or a framed presentation.
“We choose Outus when quantity and flexible mounting matter more than varied sizes or a framed presentation.”
Benziso Motivational Metal Wall Art – Inspirational Positive Quotes Wall Decor
Benziso takes a different approach from both print sets: it is one black powder-coated metal sign, sized 12.6×11 inches, with the phrase “It’s a Good Day to Have a Good Day.” Predrilled holes are intended to make nail hanging straightforward, and the listing describes the finish as water- and fade-resistant for indoor or outdoor use. Among these three, this is the clearest fit for a porch, sheltered outdoor area, or a small wall where one concise message is enough.That durability and distinct material come with a narrower message choice. We get one phrase rather than a collection, so it cannot provide the variety of DSHFG or the wider coverage of Outus. The product description also notes a chance of deformation during shipping that may require manual adjustment, and pointed parts may be a concern around children. It is a better match than the paper sets when we want a metal sign and outdoor versatility; it is a weaker choice when we want multiple quotes, a soft typography-led gallery, or a child-accessible placement without sharp edges.
Pros:
- Powder-coated metal is described as water- and fade-resistant.
- Suitable for indoor or outdoor use according to the listing.
- Predrilled holes support nail hanging.
- Distinct single-message focal point in a compact 12.6×11-inch size.
Cons:
- Includes only one sign and one motivational phrase.
- May arrive deformed and require manual adjustment.
- Pointed parts may pose a safety concern around children.
Best for: Buyers who want one compact motivational phrase in metal, especially for an indoor or outdoor spot where paper prints are less suitable.
Not ideal for: Anyone looking for several quotes, a coordinated print set, a framed look, or decor for an area within children’s reach.
Bottom line: We recommend Benziso when a durable metal statement matters more than message variety or a print-gallery look.
“We recommend Benziso when a durable metal statement matters more than message variety or a print-gallery look.”
As an Amazon Associate we earn from qualifying purchases.
Before You Start
Pick a message you are comfortable seeing every day. A short quote usually works better than a long passage because it stays readable at a distance. If you plan to use words written by someone else, confirm the wording and attribution, and check whether you have permission to reproduce it for your intended use. Measure the wall area first; designing without a target size often leads to text that is too small or a print that feels lost in the room.
Choose a display size and method before you begin the design. A framed print, canvas, and unframed poster need different margins and mounting approaches. Keep the artwork away from heat, moisture, and direct sunlight when possible, as these can damage paper, ink, or paint.
Step-by-Step Instructions
Step 1: Choose a short, accurate quote
Write down the message you want the artwork to deliver, then narrow it to one sentence or a few memorable words. Read the quote aloud and check that it sounds natural to you. If it comes from a book, song, speech, or another creator, verify the exact wording and attribution from a reliable source before putting it into the design. If you prefer an original line, write it in your own words and keep the meaning clear.
Decide whether the piece should feel calm, energetic, playful, or formal. That choice will guide the color, type, and display style. Avoid adding several unrelated messages; one focused idea gives the viewer a clear point to take away.
Tip: Keep a longer explanation for a card or note beside the artwork. Dense paragraphs rarely work well as wall text.
Check: You have one verified line, know who should be credited if applicable, and can explain the feeling you want the artwork to convey.
Step 2: Measure the display area
Measure the width and height of the wall area where the piece will hang. Note nearby furniture, doors, switches, shelves, and other artwork. Measure the frame or poster size you intend to use, including its outer edge, so you know how much wall it will occupy. If the artwork will sit above furniture, leave a visually comfortable gap and account for the furniture height when selecting the hanging position.
Use painter’s tape or paper cut to the planned size to mark the shape on the wall. Step back to the usual viewing point, such as the doorway or seat where you expect to see the quote. Adjust the dimensions before designing if the mockup looks too small, too large, or awkwardly placed.
Tip: Check the layout from the side of the room where people usually enter. A placement that looks balanced up close may feel off from the main viewing angle.
Check: A paper or tape outline fits the wall and looks balanced from the room’s normal viewing positions.
Step 3: Select materials and a display method
Choose a framed print for a tidy, protected finish; a poster hanger for a lighter, casual look; or a painted canvas or board for a handmade result. Match the print paper to the method: heavier paper can sit more smoothly in a frame, while paper designed for your printer can improve color and text sharpness. Check the frame’s opening size, since its visible area may be smaller than the listed paper size.
Gather the display supplies before making the artwork. For a frame, confirm that the backing, glazing, and hanging hardware are included. For a painted piece, prepare a clean work surface, suitable paint, brushes, and a ruler. Choose wall fasteners based on the wall material and the complete weight of the art; do not assume a small nail or adhesive strip can support every frame.
Tip: Buy or borrow the frame before finalizing the design. This prevents a mismatch between the artwork dimensions and the frame opening.
Check: You know the finished outside dimensions and have the materials needed to make and hang the piece.
Step 4: Plan a readable layout
Sketch a few arrangements on paper or create a blank canvas at the finished artwork size in your design app. Place the quote where it has room to breathe, and leave margins around the text so it does not crowd the frame. Give the most important word or line the strongest visual emphasis through size, weight, or placement. Use no more type styles than you can comfortably distinguish at a glance.
Choose a background and text color with strong contrast. Dark lettering on a light background or light lettering on a dark background tends to read clearly. Keep decorative elements limited to shapes, borders, or small illustrations that support the message. Avoid placing important words near the edge, where a frame may cover them.
Tip: View the design at the size it will appear on the wall. Text that looks large on a phone screen can print much smaller than expected.
Check: The quote is the first thing you notice, the wording is fully visible, and the design has clear margins.
Step 5: Create the artwork
Build the final design using your chosen method. In a digital app, enter the verified wording, add the attribution if needed, and set the canvas to the intended print dimensions. Use high-quality text or vector elements where available so letters remain crisp when printed. For hand lettering, lightly sketch the text in pencil, measure the line spacing, and test the lettering on scrap paper before applying paint or ink to the final surface.
Work from the largest elements to the smallest. Position the main quote first, then add a supporting line, attribution, or simple decoration. Save a separate editable copy of a digital design, or take a photo of the pencil sketch before painting. This gives you a reference if you need to revise the piece.
Tip: Do not rely on color alone to create emphasis. Size, spacing, and weight also help the important words stand out.
Check: The design contains the exact wording, the text is clear, and any credit is present and legible.
Step 6: Review and test the design
Proofread the quote and attribution letter by letter. Check punctuation, capitalization, and line breaks against your source or original draft. Then view the design at full size on screen or print a low-cost draft. Stand several steps away and see whether you can read the main message without leaning in. Check that the contrast remains strong and that no letters are hidden near the edges.
Ask another person to read the wording if possible. Fresh eyes can catch a missing word or an awkward line break that you have stopped noticing. Make corrections in the editable file or on the sketch, then review the final version again before producing the finished piece.
Tip: A test print on ordinary paper can reveal sizing and margin problems before you use specialty paper or paint the final surface.
Check: The text has no spelling errors, reads at the intended distance, and fits inside the visible frame area.
Step 7: Print, paint, or assemble the finished piece
Print the final file at the intended size using the correct paper setting, or send it to a print shop with the finished dimensions and color file. Check the preview for cropping and scaling before confirming the print. If painting, transfer the approved layout lightly to the surface and complete the background and lettering in an order that suits the materials. Let each layer dry for the time listed on the product label.
Inspect the finished artwork under the room’s normal lighting. Look for smudges, uneven edges, cropped text, or distracting glare. Place the print in the frame without bending the corners, or attach the poster to its hanger according to the product directions. Wipe dust from the frame and glazing before closing it.
Tip: Printer dialogs may enlarge or shrink an image to fit the page. Confirm the scale and paper size so the finished artwork keeps the planned dimensions.
Check: The finished piece is clean, dry, undamaged, and matches the measured size.
Step 8: Hang the artwork and check its position
Hold the finished piece against the marked wall area and adjust the height until it looks comfortable from the main viewing point. Mark the hanging point lightly with a pencil. Use a level to check the top edge, then install wall hardware suited to the wall type and artwork weight, following the hardware directions. If the wall may contain wiring or pipes, use a suitable detector or choose a different location before drilling.
Hang the piece, step back, and compare it with the tape outline and nearby furniture. Adjust the position if it looks tilted or off-center. Remove temporary marks and tape once the display looks balanced. Keep the artwork clear of places where it may be bumped, splashed, or exposed to strong heat.
Tip: For two hanging points, measure their spacing on the frame and transfer both positions to the wall. Check the marks with a level before installing the hardware.
Check: The piece hangs securely, sits level, and can be read from the usual viewing position.
Common Mistakes to Avoid
- Choosing a quote that is too long for the available space. — Shorten the message to its central idea or choose a larger display area. Check readability from several steps away before producing the final piece.
- Using colors or decorative fonts that make the text hard to read. — Keep strong contrast between text and background, use decorative lettering sparingly, and test the design at its intended size.
- Designing to the paper size without checking the frame opening. — Measure the visible opening and leave enough margin so the frame does not cover words or attribution.
- Hanging the artwork with hardware that cannot support its weight. — Check the complete weight, wall material, and hardware rating. Follow the mounting product directions and use appropriate anchors when needed.
Troubleshooting
Problem: The printed text looks blurry or jagged.
Solution: Export or print from the original design file at the intended dimensions. Use a high-quality setting and avoid enlarging a small image. If the text is still unclear, rebuild it with editable text or vector lettering.
Problem: Part of the quote disappears under the frame edge.
Solution: Remove the print and compare it with the frame’s visible opening. Reprint with wider margins or reposition the text before placing it back in the frame.
Problem: The frame keeps tilting after you hang it.
Solution: Check that the hook and frame hanger are centered and that the wire or hanging points sit securely. For a frame with two attachment points, install both at the same height and confirm with a level.
Problem: The artwork looks washed out or reflects too much light.
Solution: Move it away from direct sunlight or a strong lamp. Try a less reflective glazing option, or choose a background and text treatment with stronger contrast.
What Success Looks Like
Your completed wall art shows the intended quote with accurate wording and any needed attribution. The main message is readable from the usual viewing distance, the layout fits the frame or display surface without clipped text, and the colors look clear in the room’s lighting. The piece hangs level and securely, with no visible damage, distracting glare, or crowded margins.
Next Steps
Dust the frame or display surface as needed, and check the hanging hardware after moving furniture or bumping the wall. If the room layout changes, use the paper mockup again before relocating the art. Replace the piece when the message no longer suits the space, or make a new one for a different room using the same measured layout process.
Frequently Asked Questions
How large should motivational quote wall art be?
Choose a size that suits the wall and remains readable from the main viewing position. Mark the proposed dimensions with paper or tape, then step back to judge the scale. A short quote can work at a smaller size; a longer message needs more space and larger lettering.
What font works best for a quote print?
Use a clear font with distinct letter shapes. You can pair one expressive style for a short emphasized phrase with a simple font for the rest, but avoid using many styles in one piece. Print a draft and check that every word is easy to read from across the room.
Can I make quote wall art without a printer?
Yes. Draw or paint the design on paper, canvas, or a prepared board. Sketch lightly, measure the margins, and test your lettering on scrap material before working on the final surface. You can also ask a local print shop to produce a digital design.
How do I hang a framed print without damaging the wall?
Check the wall finish and frame weight, then select hardware rated for both. Adhesive mounting products may suit some lightweight pieces and surfaces, but they can damage paint or fail on unsuitable finishes. Follow the product’s weight and surface instructions, and test the location before hanging valuable artwork.
Include an attribution when the wording comes from someone else and the source is known. Verify the credit and keep it readable. If you cannot confirm who wrote the line, do not guess; use a verified quote or write an original message.
Halloween Picks
halloween
As an affiliate, we earn on qualifying purchases.