
To get started with latte art, focus on the essential tools like a high-quality espresso machine, steam wand, and milk pitcher. Mastering the frothing technique is vital for achieving that silky microfoam that makes designs stand out. Pay attention to espresso quality, as it forms the base for your art. With consistent practice and a willingness to experiment, your skills will improve. There’s so much more to uncover about styles and techniques, so keep exploring!
Key Takeaways
- Start with high-quality espresso to ensure a rich crema, which serves as the foundation for stunning latte art.
- Master milk frothing techniques to create silky microfoam, crucial for stable and intricate designs.
- Use a proper milk pitcher and thermometer to achieve the ideal milk texture and temperature for pouring.
- Practice pouring techniques, focusing on angles and speed to refine your designs and prevent messy results.
- Experiment with different styles and shapes, gradually increasing complexity to enhance your skills and creativity in latte art.

SHARDOR Espresso Machine 20 Bar, Professional Espresso Machine with Milk Frother and Touchscreen, Expresso Coffee Machines with Adjustable Temperature,for Cappuccino, Latte, Stainless Steel, Silver
Professional 20 Bar Pressure System: This semi-automatic espresso maker has a 20-bar pump and a powerful 1350W motor,…
As an affiliate, we earn on qualifying purchases.
As an affiliate, we earn on qualifying purchases.
The Essential Tools for Creating Latte Art

Creating stunning latte art starts with having the right tools at your fingertips. The essential equipment includes a high-quality espresso machine, a steam wand, and a milk pitcher. A good espresso machine guarantees you get the perfect shot, while the steam wand helps you froth milk to the ideal texture. When it comes to milk pitchers, choose one with a spout that allows for precision pouring; this is vital for creating intricate designs. Don’t forget a thermometer to monitor your milk temperature—aim for around 150°F to 160°F for the best results. Finally, consider investing in a latte art tool, like a stylus or a spoon, to help refine your designs. With these latte art tools, you’re well on your way to mastering the craft.

Milk Frothing Pitcher, 600ml (20oz) Milk Frother Cup Stainless Steel Jug Steaming Pitcher, Milk Coffee Cappuccino Latte Art Barista Steam Pitchers Milk Jug Cup with Decorating Pen
Food Grade Material : This milk frothing pitcher is made of high-quality 304 stainless steel, which is rust…
As an affiliate, we earn on qualifying purchases.
As an affiliate, we earn on qualifying purchases.
Why Espresso Quality Matters for Your Latte Art?

The quality of your espresso plays a pivotal role in achieving beautiful latte art. If your espresso extraction is off, it can lead to a bitter or overly sour shot, ruining the flavor balance essential for a great drink. When you use high-quality beans and perfect your extraction technique, you create a rich, velvety crema that serves as the perfect canvas for your art. A well-extracted espresso not only enhances the taste but also allows for better contrast with the milk, making your designs pop. Remember, the foundation of your latte art lies in that perfectly brewed espresso. So, focus on mastering your espresso technique to elevate your latte art game to new heights!
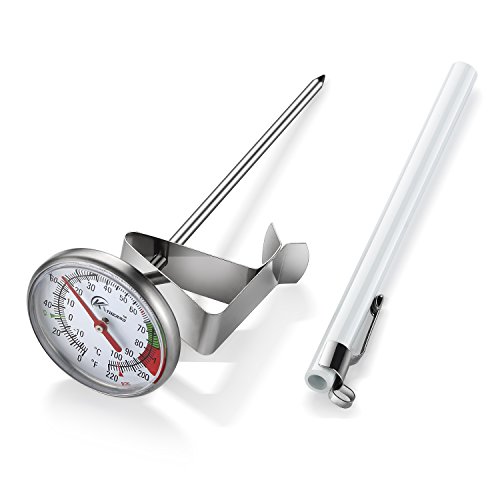
KT THERMO Instand Read 2-Inch Dial Thermometer,Best for The Coffee Drinks,Chocolate Milk Foam
DESIGN:Multi-stage design of the fixed clip, adjust the thermometer read the location of the disk surface to facilitate…
As an affiliate, we earn on qualifying purchases.
As an affiliate, we earn on qualifying purchases.
Mastering Milk Frothing Techniques
To create stunning latte art, mastering milk frothing techniques is essential. You’ll need the right equipment and a good understanding of how to texture milk properly. Let’s explore the tools you’ll need and the techniques that will elevate your frothing skills.
Frothing Equipment Essentials
While mastering milk frothing techniques requires practice, having the right equipment can make all the difference. Here’s what you need to guarantee perfect frothing consistency and ideal frothing temperature:
- Steam Wand: A powerful steam wand is vital for creating microfoam that’s silky and rich. Understanding steam wand capabilities can help you choose the right wand for your machine.
- Frothing Pitcher: Use a stainless steel pitcher for better heat retention and control over your pour.
- Thermometer: An accurate thermometer helps you monitor frothing temperature, making sure you don’t scald the milk.
- Milk Type: Experiment with different milk types, as each yields unique frothing results.
- Cleaning and Maintenance: Regularly clean your equipment, especially the steam wand, to prevent milk residue buildup and ensure optimal performance for consistent results. Proper maintenance also extends the lifespan of your equipment and keeps it functioning efficiently for optimal frothing performance.
With these essentials, you’ll elevate your frothing game and create stunning lattes that impress. Don’t underestimate the power of good equipment—it’s your first step toward latte art mastery!
Texturing Milk Techniques
Having the right equipment sets you up for success, but mastering texturing techniques is where the magic happens. Start by pouring cold milk into your pitcher, filling it about one-third full. Position the steam wand just below the surface of the milk, angling it to create a whirlpool effect. This motion introduces air, which is essential for frothing. Keep an eye on the milk temperature; aim for around 150°F to 155°F for ideal texture. As the milk heats, lower the wand deeper to heat the milk evenly. Once you reach the desired temperature, stop steaming and give the pitcher a gentle swirl to incorporate any larger bubbles. Proper kitchen ventilation is important to safely dissipate steam and prevent excess moisture buildup. Monitoring steam and milk temperature helps achieve consistent results. Additionally, practicing consistent technique will help you develop a steady hand and better control over the microfoam texture. Regular practice using proper texturing methods will significantly improve your latte art skills. With practice, you’ll create that silky microfoam perfect for your latte art!

2-Pack Latte Art Pen Set, Stainless Steel Coffee Drawing Tool with Wood Handle, Double-Ended Barista Accessories for Creating Professional Espresso Tools, Home & Travel & Cafe Use
Premium Material Composition: Crafted with high-quality stainless steel and wood, these latte art pens ensure durability and a…
As an affiliate, we earn on qualifying purchases.
As an affiliate, we earn on qualifying purchases.
Choosing the Right Milk

Choosing the right milk is essential for creating beautiful latte art, as it greatly impacts both texture and flavor. The milk types you choose can transform your drink from ordinary to extraordinary. Here’s what you should consider:
- Whole Milk: With higher milk fat, it creates a creamy texture that’s perfect for frothing.
- 2% Milk: A balance between creaminess and lightness, offering good foam stability.
- Non-Dairy Alternatives: Options like oat or almond milk can add unique flavors, but frothing can be tricky.
- Skim Milk: Lower fat content means less creaminess, but it can still create decent foam.
Experimenting with these milk types will help you find the perfect match for your latte art journey!
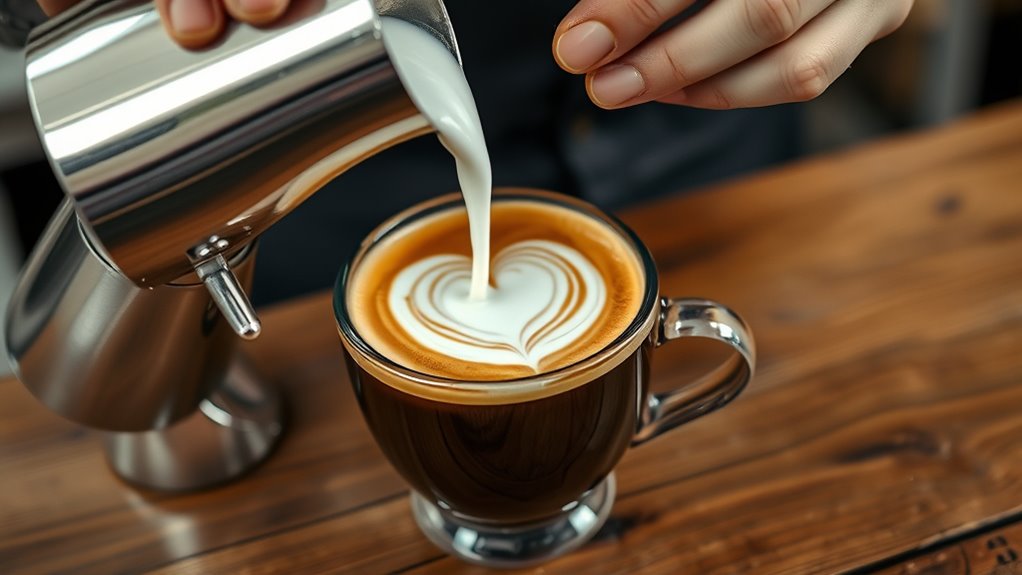
Pouring Techniques for Stunning Latte Art

To create stunning latte art, mastering basic pouring techniques is essential. You’ll need to control your pour speed to achieve the desired patterns and designs. With practice, you’ll see how these techniques can transform your coffee into a canvas.
Basic Pouring Techniques
Mastering the art of pouring is essential for creating stunning latte designs that wow your customers or guests. Start by focusing on a few key techniques to elevate your skills:
- Cup Selection: Choose a wide, white cup to showcase your art.
- Pouring Angles: Hold the pitcher at a 45-degree angle for a smooth pour.
- Initial Pour: Begin pouring into the center of the cup to create a base layer.
- Finishing Touches: As you see the crema, raise the pitcher and pour slowly to form your design.
Control Your Pour Speed
While you may have the basics down, controlling your pour speed is essential for achieving those intricate latte art designs. Pour speed plays a significant role in how your milk interacts with the espresso. If you pour too fast, you’ll create a chaotic swirl; if you pour too slow, the milk may sink. Start by practicing different control techniques. For example, try varying your height—pouring from a higher position to incorporate air for frothiness, then lowering it for detail. Watch the surface tension; you want the milk to rise and form shapes. By mastering your pour speed, you’ll find it easier to create hearts, rosettas, and more. Keep experimenting, and don’t be afraid to adjust as you go!
Top Mistakes to Avoid When Creating Latte Art

Creating stunning latte art can be a rewarding experience, but it’s easy to stumble into common pitfalls that can ruin your designs. To help you avoid these design mistakes, here are four key points to keep in mind:
- Inconsistent Milk Texture: Make sure your milk is velvety and microfoam is well-integrated; otherwise, your art won’t hold its shape.
- Poor Pouring Technique: Control your pour speed and angle; a rushed pour can lead to messy designs.
- Wrong Cup Size: Using an inappropriate cup can distort your art; choose the right size for your design.
- Neglecting Practice: Skipping practice can hinder your progress; commit to regular sessions for improvement.
How to Practice and Improve Your Latte Art Skills

To elevate your latte art skills, focus on consistent practice and experimentation. Establish daily practice routines that include pouring techniques and foam texturing. Start with basic shapes and gradually introduce more complexity; this will guarantee steady skill progression. Use a mirror to observe your pouring angle and adjust accordingly. Don’t shy away from experimenting with different milk types and temperatures, as these can greatly affect your results. Record your progress by taking photos of your creations, allowing you to identify areas for improvement. Additionally, seek feedback from fellow coffee enthusiasts or baristas, as they can offer valuable insights. Embrace the learning process, and remember that every cup is an opportunity to refine your artistry.
Discover Various Latte Art Styles and Patterns

As you refine your latte art skills, exploring different styles and patterns can add excitement to your practice. Here are some enchanting designs to try:
- Heart Patterns – Perfect for showing love in every cup.
- Tulip Designs – A beautiful combination of layers, symbolizing growth.
- Swan Creations – Elegantly shaped and sure to impress, evoking grace.
- Wave Patterns – Dynamic and fluid, they add a touch of movement.
Don’t forget to play with seasonal themes and animal shapes, or even venture into abstract art for a unique twist! Each design you create not only enhances your skills but also transforms your lattes into delightful experiences. Embrace the joy of experimentation, and let your creativity flow!
Frequently Asked Questions
Can I Use Non-Dairy Milk for Latte Art?
Yes, you can use non-dairy milk for latte art! Many people enjoy non-dairy options like oat, almond, or soy milk. However, not all non-dairy milks froth equally well. Look for those specifically made for baristas, as they’ve been formulated to create better foam. When milk frothing, make sure you achieve a silky texture to make your latte art pop. Experiment with different brands until you find the one that works best for you!
How Long Does It Take to Master Latte Art?
It typically takes several months to master latte art, but it really depends on your dedication and practice techniques. As you consistently practice, you’ll notice your skill progression accelerating. Start with basic shapes before moving on to complex designs. You’ll encounter challenges, but don’t get discouraged; each attempt teaches you something new. The more you pour, the better you’ll become, so stick with it and enjoy the journey of improvement!
Is Latte Art Just for Experienced Baristas?
Latte art’s not just for seasoned specialists! You can certainly start creating beautiful designs with beginner techniques. Avoid common mistakes like over-steaming the milk or pouring too quickly. Focus on mastering the milk texture and practicing your pour. With patience and persistence, you’ll be crafting gorgeous patterns in no time. So grab your espresso and milk, and plunge into the delightful world of latte art—your journey’s just beginning!
Can I Use a Regular Coffee Instead of Espresso?
You can use regular coffee instead of espresso, but the results might not be as rich or vibrant. Espresso alternatives like strong brewed coffee or cold brew can work too, but keep in mind that the texture and flavor will differ. For the best latte art, aim for a concentrated coffee that can hold its shape. Experimenting with different coffee types can lead to some unique creations you might enjoy!
What Are the Health Benefits of Drinking Lattes?
They say, “A cup of coffee a day keeps the doctor away,” and lattes fit right in! Drinking lattes can boost your mood thanks to their caffeine content, giving you that needed energy. Plus, they’re a great source of antioxidants, which help combat free radicals in your body. So, when you enjoy a well-crafted latte, you’re not just treating yourself; you’re also supporting your health! Enjoy your cup of goodness!
Conclusion
Creating latte art is like painting on a canvas; with the right tools and techniques, you can transform a simple cup of coffee into a masterpiece. Remember, the quality of your espresso and milk is vital, and practice makes perfect. Avoid common pitfalls, and soon you’ll be swirling beautiful patterns that impress your friends. So grab your milk pitcher and espresso machine, and let your creativity flow! Your next latte could be your best work yet.