Door weatherstripping is a simple, budget-friendly way to cut drafts, reduce energy bills, and keep your home comfortable. It seals gaps around your door, preventing air leaks and improving insulation. Choosing the right material—like foam, vinyl, or rubber—and measuring carefully guarantees a tight fit. Proper installation and regular maintenance maximize savings and home comfort. Keep exploring to discover how proper weatherstripping can transform your energy efficiency and save you money.
Key Takeaways
- Sealing gaps around doors prevents drafts, reducing energy loss and lowering heating/cooling costs cost-effectively.
- Measure door gaps accurately to select the right weatherstripping type and size for optimal insulation.
- Foam tape is a cheap, easy-to-install option suitable for indoor or low-traffic areas.
- Proper cleaning and careful application ensure weatherstripping stays effective and lasts longer.
- Regular maintenance and prompt replacement of damaged seals maximize energy savings and home comfort.

Black Rubber Weather Stripping Door Seal Strip, D Shape Door Weather Seal Strip, Self-Adhesive Soundproofing Frame Insulation Tape for Doors Frame/Window Seal,Blocks Cold Drafts Noise
【THICKENED SILICONE MATERIAL – COMPLETELY BARRIERING AIR AND NOISE】:The weather stripping is made of thickened TPE material with…
As an affiliate, we earn on qualifying purchases.
As an affiliate, we earn on qualifying purchases.
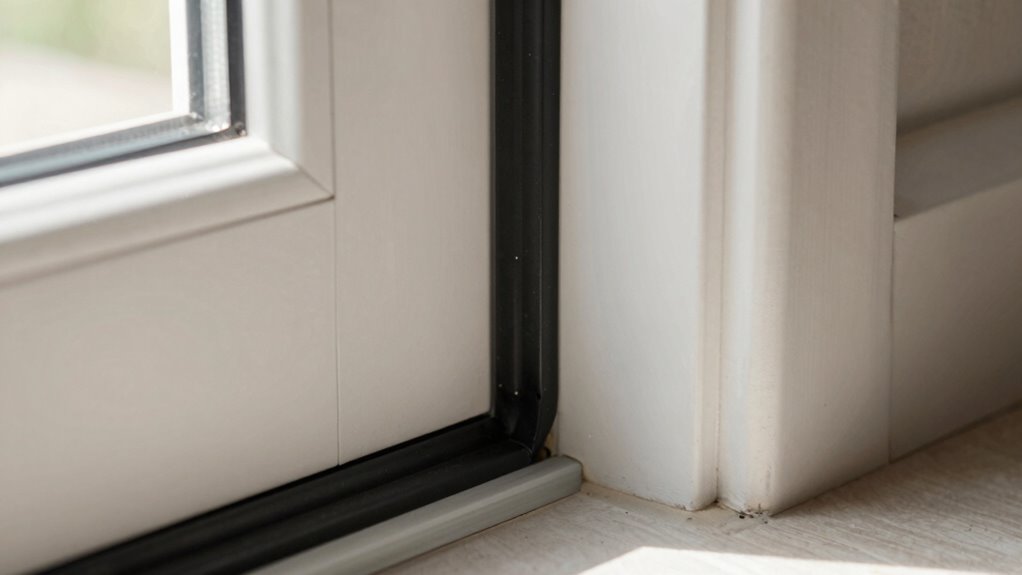
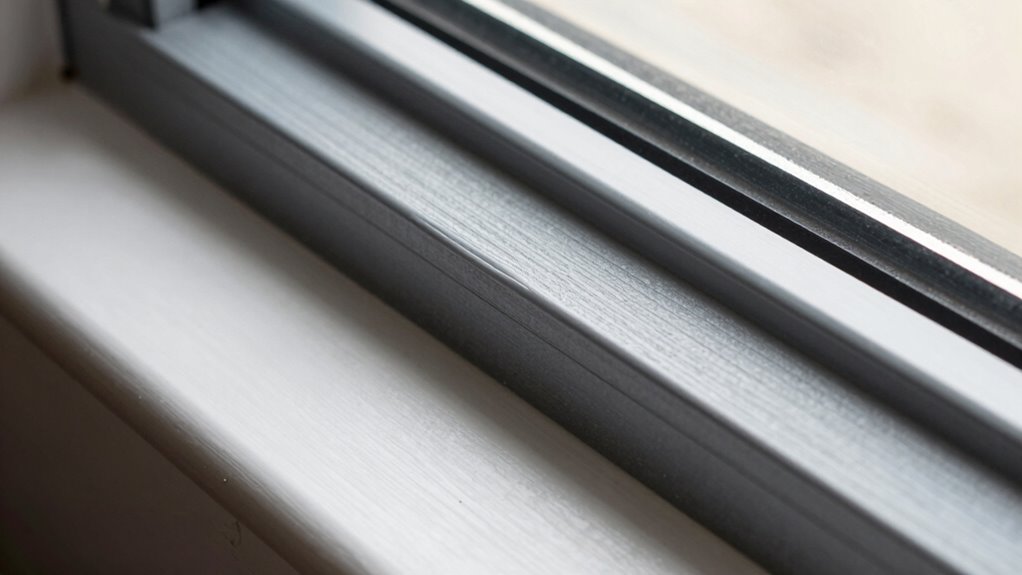
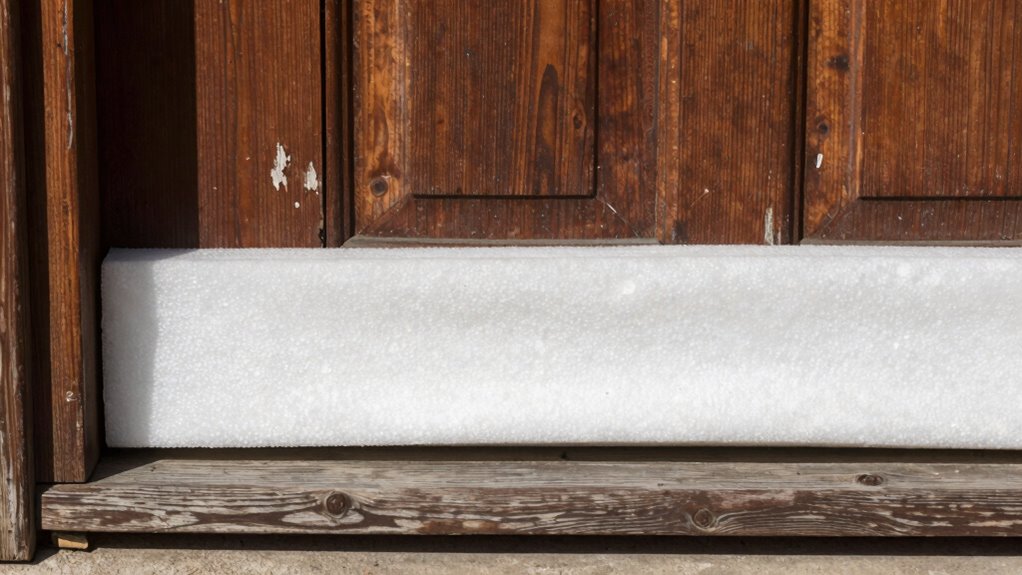
What Is Door Weatherstripping and How Does It Work?
Door weatherstripping is a simple yet effective way to seal gaps around your doors, preventing drafts, leaks, and energy loss. It works by creating a barrier that improves door insulation, ensuring cold air stays out and warm air stays in. When properly installed, weatherstripping fills the small spaces that develop over time due to door shifting or settling. This prevents drafts that can make your home uncomfortable and increase heating or cooling bills. By blocking air leaks, it enhances energy efficiency and keeps your indoor environment stable. Weatherstripping is affordable, easy to install, and a practical solution for draft prevention. It’s an essential step toward maintaining a cozy home while saving money on energy costs. Additionally, sealing gaps around doors can also help reduce the intrusion of microplastics in dust, contributing to a healthier indoor environment.

Bantie 33FT EVA Weather Stripping Door Seal Foam Tape with Adhesive Foam Sealing Strip Window Weather Stripping Door Insulation Soundproofing
[Newly upgraded adhesive]: The upgraded mesh adhesive ensures the longest adhesion, is easy to operate, and is highly…
As an affiliate, we earn on qualifying purchases.
As an affiliate, we earn on qualifying purchases.
Choosing the Right Weatherstripping Material for Your Doors
Selecting the right weatherstripping material is essential to guarantee a proper seal and long-lasting performance. Your choice impacts door seal maintenance and weatherstripping lifespan. Consider the door’s exposure, climate, and usage frequency. For instance, vinyl or foam tapes are affordable but may wear faster; silicone or rubber seals last longer and resist weathering. Use the table below to compare options:
| Material | Durability | Best For |
|---|---|---|
| Foam | Short lifespan | Indoor, low-traffic areas |
| Vinyl | Moderate lifespan | Moderate outdoor exposure |
| Rubber/ Silicone | Long lifespan | Heavy use, outdoor weather |
Choosing the right material guarantees energy efficiency and minimizes replacement costs. Additionally, understanding the weathering resistance of different materials can help ensure your door remains sealed against the elements over time.
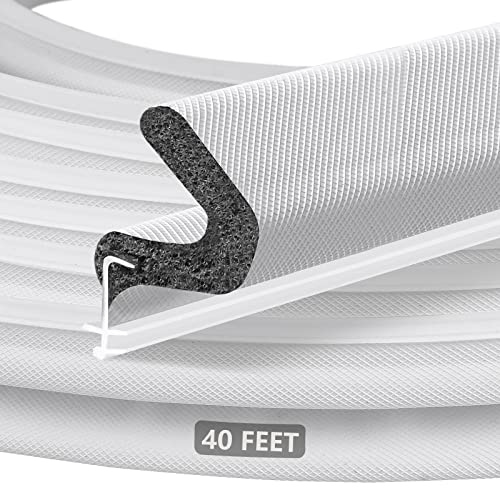
40FT Extra Long Kerf Weather Stripping Door Seal for Large Gaps and Easy Installation (White)
Complete Light Blockage: Our white weather stripping features a dark gray foam core, effectively blocking all light from…
As an affiliate, we earn on qualifying purchases.
As an affiliate, we earn on qualifying purchases.
Measuring Door Gaps for Proper Sealing

To guarantee your weatherstripping fits perfectly, you need to measure the door gaps accurately. Use the right tools, like a ruler or a gap gauge, to identify the exact size of each gap. Record your measurements carefully so you can choose the best weatherstripping material for a proper seal. Considering the contrast ratio of your door and surrounding environment can also help determine the most effective sealing approach.
Identify Gap Size
Before choosing the right weatherstripping, you need to accurately measure the gap around your door. Start by inspecting the entire perimeter, noting where the door doesn’t sit flush. Use a ruler or a gauge to determine the width of the door gap at various points—bottom, sides, and top. It’s important to measure each gap size precisely because different areas may require different weatherstripping types. A small seal gap might need a thin strip, while larger gaps require more substantial material. Be sure to record the measurements carefully. Correctly identifying the gap size helps you select the most effective weatherstripping, ensuring a tight seal that prevents air leaks. Precise measurements also support energy efficiency by helping you choose the right materials. Accurate measurements save you time and money, maximizing energy efficiency.
Use Proper Tools
Using the right tools guarantees you get accurate measurements of your door gaps, which is essential for choosing the correct weatherstripping. Proper measurement ensures effective door insulation and draft prevention. To do this:
- Use a ruler or tape measure to gauge the gap width at multiple points around the door.
- Employ a piece of paper or cardboard to test the gap’s tightness; if it slides out easily, the gap is larger.
- Have a flashlight handy to inspect hard-to-see areas, ensuring no gaps are missed.
These tools help you determine the exact size of your door gaps, so you select weatherstripping that seals properly, reducing energy loss and keeping drafts out. Accurate measurements lead to better door insulation and a more energy-efficient home.
Record Measurements Accurately
Accurately recording your door gap measurements guarantees you select the right weatherstripping for a tight seal. Use a ruler or a gap gauge to measure the space between the door and frame at the top, sides, and bottom. Note these measurements carefully, as they determine the type of door insulation or sealant types needed. For small gaps, a foam or rubber weatherstrip works best; larger gaps may require a door sweep or vinyl seal. Be sure to measure in multiple spots, since gaps can vary. Clear measurements prevent you from buying the wrong materials and assure a proper fit for maximum energy efficiency. Precise measurements help you choose the best sealant types, reducing drafts and saving on heating and cooling costs. Additionally, understanding air leakage paths can guide you in selecting the most effective weatherstripping solutions.

Door Gap Measuring Tool, 1-15mm Fire Door Gap Gauge Checker Tool Engineering Ruler,Vernier Feeler Gauges for House Engineering Inspection Flatness Measuring 0.5mm
Feeler Gauge Wedge-Shaped Vernier Feeler Gauge 1-15mm Housing
As an affiliate, we earn on qualifying purchases.
As an affiliate, we earn on qualifying purchases.
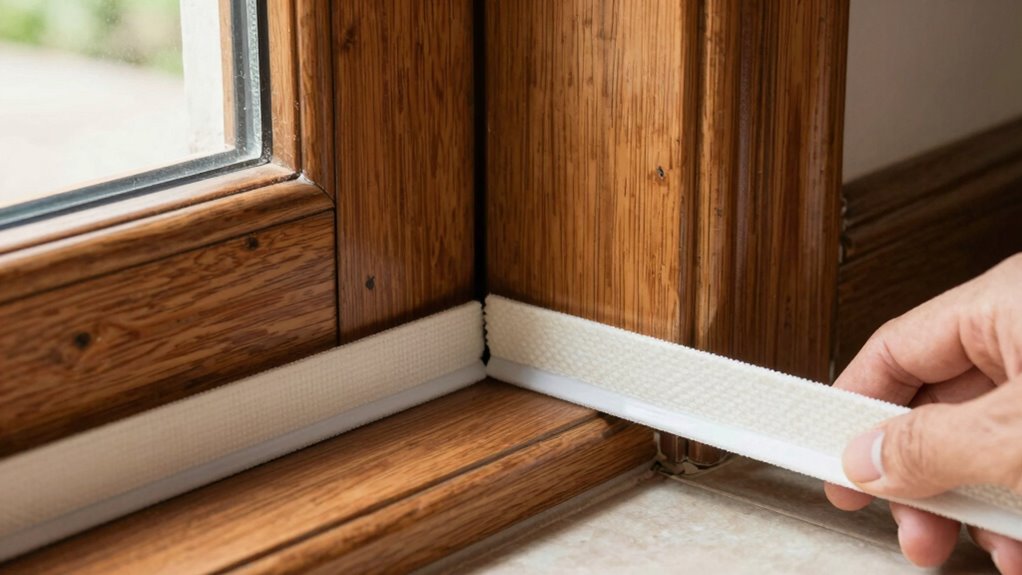
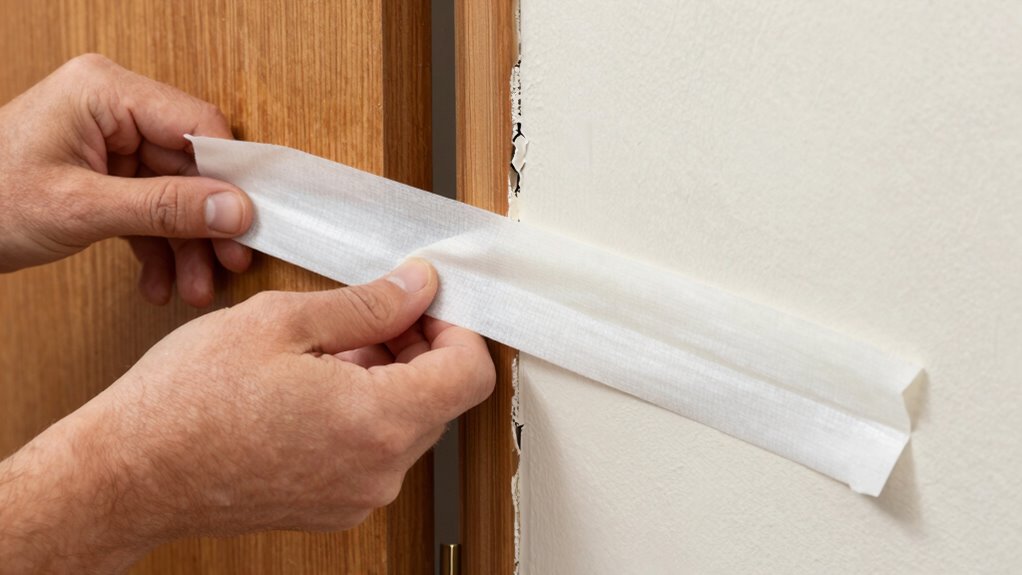
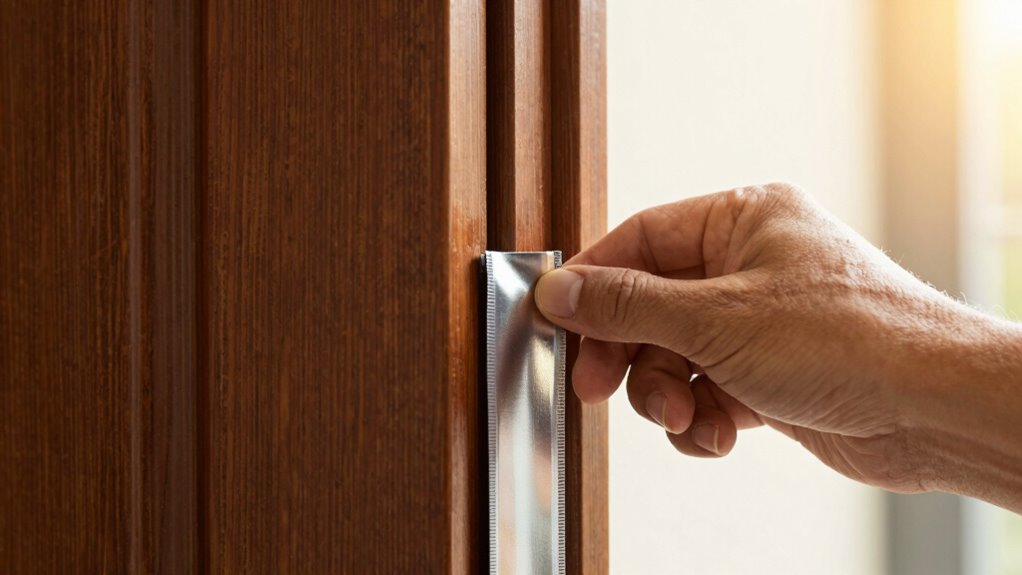
Step-by-Step: How to Install Weatherstripping on Doors
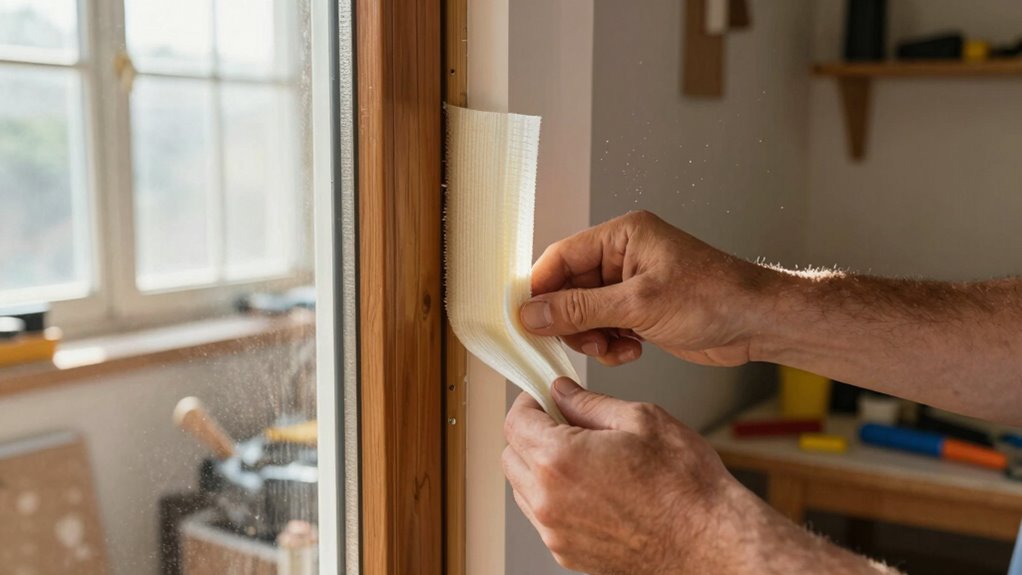
To start installing weatherstripping on your door, gather all the necessary materials and prepare the door frame area by cleaning it thoroughly. Make sure you have the right type of weatherstripping for your door and measure carefully before cutting. Then, follow the steps to apply the weatherstripping properly, ensuring a tight seal. Additionally, consider selecting the best weatherstripping material based on your climate and door type to maximize energy savings.
Gather Necessary Materials
Gathering the right materials before starting guarantees your weatherstripping project goes smoothly. First, you’ll need door insulation options, like foam or rubber strips, to seal gaps effectively. Second, choose the appropriate sealant types—whether adhesive-backed weatherstripping or caulk—to ensure a tight seal. Third, gather tools such as scissors, a utility knife, and a putty knife to cut and apply the materials precisely. Make sure to measure the door’s dimensions accurately so you get the right length of weatherstripping. Having these materials ready assures time and prevents interruptions. Focus on selecting quality door insulation and sealant types suited for your climate and door type to maximize energy savings and comfort. Additionally, understanding smart thermostat setup can help you better control your home’s climate once the weatherstripping is installed.
Prepare Door Frame Area
Before installing the weatherstripping, it’s important to prepare the door frame area. Start with door frame prep by cleaning the surface thoroughly to remove dust, dirt, and old sealant. Use a damp cloth and mild cleaner, then let it dry completely. Inspect the frame for any damage or gaps, and repair or fill them with caulk or foam if necessary. Proper sealing techniques are essential to ensure a tight fit and maximum energy savings. Remove any loose paint or debris around the frame to create a smooth surface. Measure the door frame carefully to cut the weatherstripping accurately. Taking these steps guarantees the weatherstripping adheres well and seals effectively, reducing drafts and improving energy efficiency. Proper preparation sets the foundation for a successful installation. Additionally, understanding the importance of sound vibrations can help in recognizing how effective sealing minimizes unwanted noise infiltration.
Apply Weatherstripping Properly
Applying weatherstripping correctly is vital for creating a tight seal that keeps drafts out and improves energy efficiency. To do this effectively, follow these steps:
- Clean the door frame thoroughly to ensure good adhesion and optimal door insulation.
- Measure the length of the door edges to cut the weatherstripping accurately, preventing gaps that lead to draft prevention.
- Apply the weatherstripping evenly along the door’s perimeter, pressing firmly to create a secure seal.
- For optimal energy savings, consider Free Floating options that allow your door to adapt naturally to environmental changes.
Make sure the weatherstripping fits snugly without pinching or bunching. Proper installation helps maintain door insulation, reduces drafts, and saves energy. Take your time during application to ensure maximum effectiveness and a more comfortable, energy-efficient home.
Common Mistakes to Avoid When Installing Weatherstripping
Installing weatherstripping might seem straightforward, but certain mistakes can undermine its effectiveness. One common error is choosing the wrong type of material, which affects draft prevention and durability. For example, using a low-quality seal may quickly deteriorate or fail to block drafts. Another mistake is improper installation—gaps or misaligned strips allow air leaks, reducing energy savings. Be sure to measure carefully and follow the manufacturer’s instructions to guarantee a tight fit. Additionally, neglecting to clean the surface before installation can prevent proper adhesion, causing the weatherstripping to peel away over time. Material selection is crucial to ensure long-lasting performance and effective draft blocking. Avoiding these mistakes helps maximize the material’s durability and keeps drafts out, improving energy efficiency and comfort in your home. Proper installation ensures your weatherstripping works effectively for years to come.
Maintaining and Replacing Weatherstripping Over Time
Over time, weatherstripping can wear out or become less effective, which may lead to increased drafts and higher energy bills. To maintain its effectiveness and maximize weatherstripping longevity, you should regularly check your door for signs of deterioration. Here’s what to do:
- Inspect for cracks, tears, or gaps in the weatherstripping.
- Clean the weatherstripping with mild soap and water to remove dirt and debris.
- Replace damaged or compressed weatherstripping promptly to guarantee proper door maintenance.
How Weatherstripping Saves Energy and Lowers Your Bills
Weatherstripping plays a crucial role in preventing drafts and air leaks around your doors, which directly impacts your energy consumption. When you seal gaps effectively, you reduce the workload on your heating and cooling systems, leading to lower bills. Proper draft prevention also enhances insulation, keeping your home warmer in winter and cooler in summer. To understand the benefits better, consider this table:
| Seal Quality | Energy Savings | Cost Effectiveness |
|---|---|---|
| Poor | Minimal | High |
| Fair | Moderate | Moderate |
| Good | Significant | Low |
| Excellent | Maximum | Very Low |
Investing in quality weatherstripping improves insulation and cuts energy costs, making it a smart, budget-friendly upgrade.
Troubleshooting Poor Seals and Drafts

Even the best weatherstripping can fail over time, leading to drafts and reduced energy savings. To troubleshoot poor seals and drafts, start by inspecting for common issues. First, check for gaps or cracks around the door frame using drafting techniques like holding a tissue or candle near the seal—if it moves, air is leaking. Second, ensure the weatherstripping material is intact and properly seated; replace any worn or damaged sections. Third, verify that the door closes fully and firmly—sometimes, misaligned hinges or warped doors cause drafts. Remember, many weatherproofing myths suggest sealing everything tightly solves all problems, but sometimes, drafts are caused by overlooked gaps or improper installation. Proper diagnosis helps you fix drafts efficiently and save energy.
Final Tips for Keeping Your Home Cozy and Cost-Effective
To keep your home cozy and cost-effective, focus on simple, proactive measures that enhance energy efficiency. Improving home insulation and sealing gaps reduces heat loss and lowers energy bills. Regularly check door weatherstripping and replace worn seals promptly. Add door sweeps or draft stoppers to block cold air from entering. Consider upgrading your insulation in attics and walls for long-term savings. Use the table below to identify quick fixes and upgrades:
| Quick Fixes | Long-Term Upgrades |
|---|---|
| Seal gaps around doors | Install energy-efficient doors |
| Use draft stoppers | Upgrade attic insulation |
| Apply weatherstripping properly | Add weather-resistant door sweeps |
Frequently Asked Questions
How Long Does Door Weatherstripping Typically Last?
Door weatherstripping usually lasts about 5 to 10 years, depending on the material and installation tips you follow. For example, foam tape may need replacing sooner, while vinyl or rubber lasts longer. To maximize lifespan, guarantee a proper seal during installation, avoid harsh weather, and check it regularly. Comparing materials helps you choose the best option for durability and cost, saving energy and money over time.
Can Weatherstripping Be Painted or Stained?
Think of weatherstripping as your home’s armor—can you paint or stain it? Generally, it’s not recommended because most weatherstripping materials aren’t paint-compatible, and staining techniques may not adhere well. I once tried staining foam weatherstripping, only to see it peel after a few days. For a fresh look, focus on cleaning and replacing worn strips rather than painting or staining, ensuring your energy-saving investments stay effective.
Is Door Weatherstripping Suitable for Outdoor Use?
Yes, door weatherstripping is suitable for outdoor use. You should choose weatherstripping types made from durable, weather-resistant door material, like rubber or vinyl, to withstand elements. These materials resist moisture, UV rays, and temperature changes better than less durable options. Make certain you select the right weatherstripping type for your door’s material and climate, so it maintains its seal and protects against drafts and water leaks effectively.
How Much Can I Expect to Save Annually With Weatherstripping?
Like finding a hidden treasure, weatherstripping can save you up to $150 annually on energy costs. You’ll notice less drafts and better insulation, leading to significant energy savings. The cost benefits outweigh the small investment, making it a smart upgrade. Expect your savings to grow over time, especially as energy prices rise. Overall, weatherstripping is a simple, effective way to cut costs and improve comfort in your home.
Are There Eco-Friendly Weatherstripping Options Available?
Yes, eco-friendly weatherstripping options are available. You can choose products made from recyclable materials or biodegradable options, helping reduce environmental impact. Look for weatherstripping made from rubber, silicone, or plant-based materials that are sustainable. These options not only improve your home’s energy efficiency but also promote eco-conscious living. Switching to biodegradable or recyclable weatherstripping supports environmental preservation while keeping your home draft-free and energy-efficient.
Conclusion
By sealing your doors, you keep drafts out and energy bills down—saving money that feels like a bonus. But neglecting weatherstripping means wasting heat and risking discomfort, turning a simple fix into a costly problem. The difference is clear: a small investment now guarantees your home stays cozy and efficient, while ignoring it invites drafts and higher costs. Choose to seal, save, and enjoy the comfort you deserve.