To stop drafts and gaps around your windows and doors, you need to caulk properly. Start by choosing the right caulk—silicone for outdoor, latex for indoor projects—and make sure surfaces are clean and dry before applying. Use steady pressure to create a smooth bead, then shape the caulk quickly for a professional finish. Regular inspections and proper techniques guarantee your home stays cozy and energy-efficient. Keep going to master each step for the best results.
Key Takeaways
- Proper surface prep, including removing old caulk and cleaning, ensures better adhesion and longer-lasting seals.
- Choose the right caulk type (silicone for outdoors, latex for indoors) for optimal flexibility and durability.
- Apply caulk steadily with a caulking gun, then smooth immediately for a clean, professional finish.
- Regularly inspect and replace old, cracked, or peeling caulk to maintain energy efficiency and prevent drafts.
- Use quality tools and accessories to ensure precise application and long-lasting, effective sealing.
Why Proper Caulking Makes Your Home More Comfortable and Energy-Efficient
Proper caulking is essential because it seals gaps and cracks around windows, doors, and other openings, preventing drafts and leaks. When you apply quality caulk correctly, you improve your home’s energy savings by reducing heat loss in winter and keeping cool air inside during summer. This helps maintain a consistent indoor temperature, leading to greater comfort year-round. By preventing air leaks, proper caulking minimizes the workload on your heating and cooling systems, saving you money on energy bills. You’ll notice a more comfortable living space with fewer cold drafts or hot spots. Ultimately, sealing these small openings makes your home more efficient and cozy, ensuring you enjoy a stable and pleasant indoor environment.
How to Choose the Best Caulk for Windows and Doors
Choosing the right caulk starts with understanding the different types of materials available, each suited for specific applications. You’ll need to take into account factors like flexibility, paintability, and weather resistance to find the best sealant for your windows and doors. Making an informed choice ensures a durable, effective seal that keeps your home comfortable and energy-efficient. Additionally, understanding content formats can help you select the most suitable product for your specific needs.
Types of Caulk Materials
When selecting the right caulk for your windows and doors, understanding the different types of caulk materials is essential. Silicone caulk offers several advantages, including excellent weather resistance, durability, and a waterproof seal. It adheres well to non-porous surfaces like glass and metal, making it ideal for exterior applications. However, it’s less flexible than other options. Latex caulk, on the other hand, provides greater flexibility, allowing it to expand and contract with temperature changes without cracking. It’s easier to apply and clean up, making it a popular choice for interior use. Knowing these differences helps you choose the best caulk for your specific needs, ensuring a long-lasting, effective seal that keeps drafts and gaps at bay. Additionally, understanding the risks associated with poorly applied caulk can help prevent future issues with drafts or leaks.
Choosing the Right Sealant
Selecting the right sealant for your windows and doors depends on considering the specific conditions and materials involved. You want a sealant that offers good sealant compatibility and blends seamlessly with your surfaces. To choose the best caulk, think about:
- Material compatibility (wood, metal, vinyl)
- Flexibility and durability needed
- Exposure to weather or moisture
- Color matching for aesthetic consistency
- Ease of application and clean-up
Matching the sealant color to your window or door trim helps keep the finish neat and professional. Make certain the sealant you select is compatible with the existing materials and environment. Understanding sealant properties can help you select the most suitable product for your project. Picking the right product not only improves insulation but also extends the lifespan of your windows and doors, making your home more energy-efficient and comfortable.
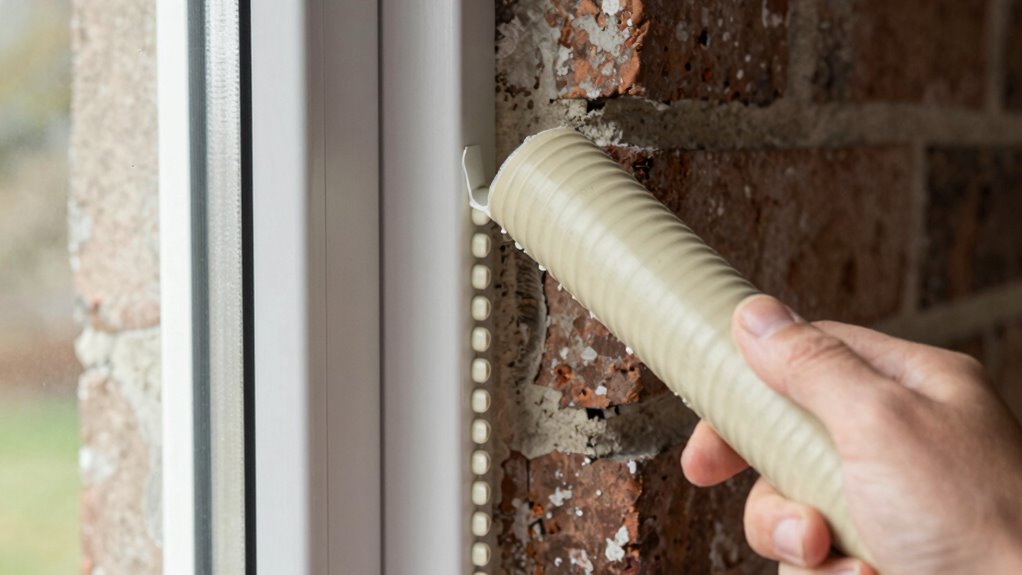
How to Prepare Surfaces Before Caulking
Before you apply new caulk, make sure to remove any old caulk completely. Then, clean the surface thoroughly to guarantee proper adhesion. Taking these steps helps your caulking last longer and work better. Additionally, ensuring the area is dry and free of debris is crucial for optimal results outdoor cooling fans.
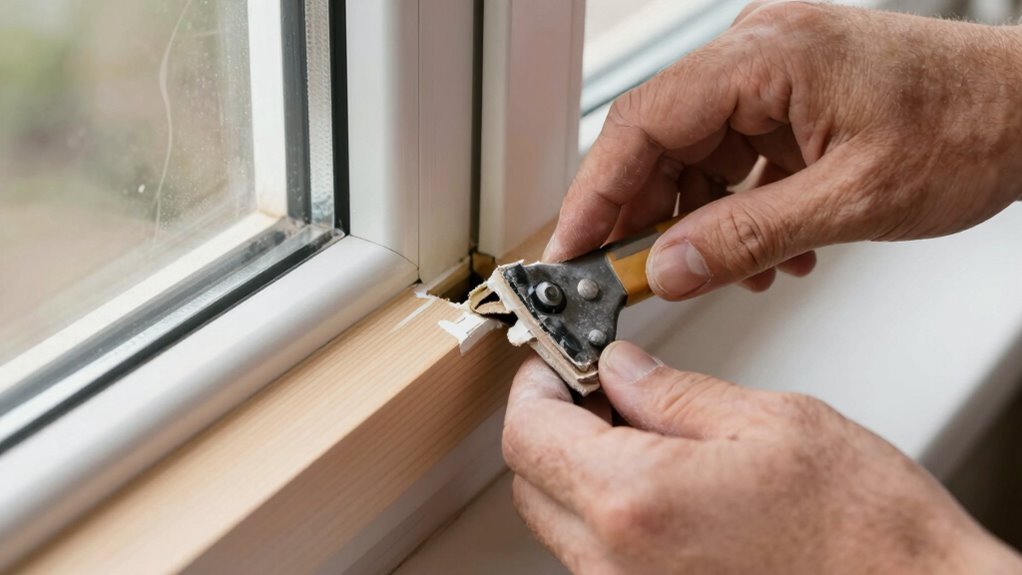
Clear Old Caulk
To guarantee a strong bond, you need to remove any old caulk from the surface thoroughly. This process, called caulk removal, ensures the new seal adheres properly. Start by selecting the right tools, like a caulk remover tool or a utility knife, to carefully scrape away the old caulk without damaging the surface. Be sure to:
- Use a caulk removal tool or putty knife to lift old caulk
- Apply a caulk softening solution if the old caulk is stubborn
- Gently scrape along the edges to avoid surface damage
- Remove all traces of old caulk for a clean surface
- Wipe the area with a damp cloth to clear debris
- Understanding interior design basics can help you plan the optimal sealing points for energy efficiency.
Completing these steps creates a solid foundation for your new caulk, ensuring a lasting seal.
Clean Surface Thoroughly
A clean surface is essential for a strong, lasting caulk seal. Proper surface prep ensures that the caulk adheres effectively and prevents future gaps or leaks. Before applying caulk, thoroughly clean the area to meet cleanliness standards, removing dirt, dust, grease, and old residue. Use a scraper or putty knife to eliminate any remaining old caulk or paint. Wipe the surface with a damp cloth or a mild cleaner to remove grease or grime. Allow the area to dry completely before caulking. Skipping proper cleaning can compromise adhesion and reduce caulk durability. Focus on creating a smooth, clean surface that’s free of debris, ensuring your caulk bonds well and provides a reliable, long-lasting seal against drafts and gaps. Proper surface preparation is a key factor in achieving effective, durable results.
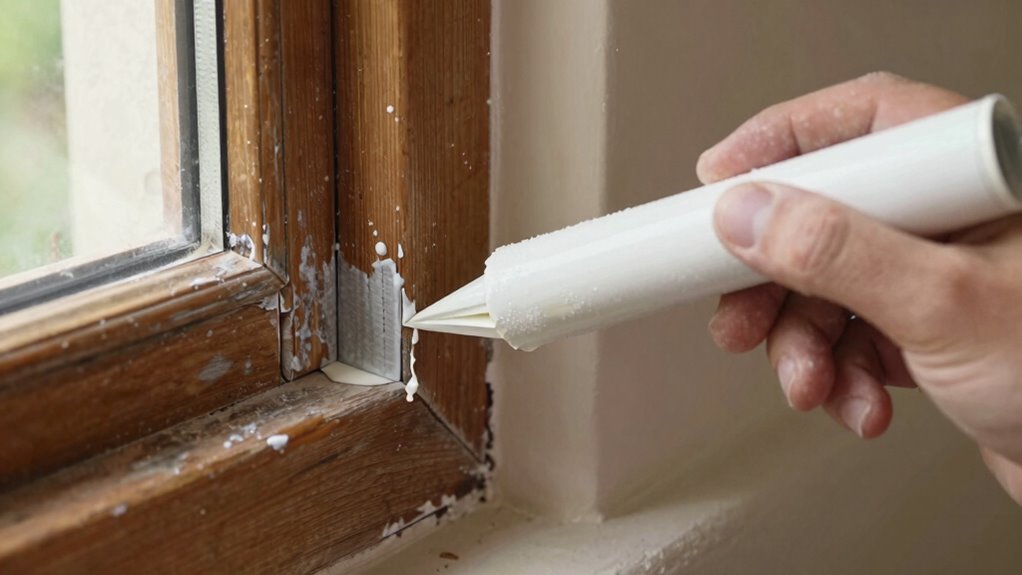
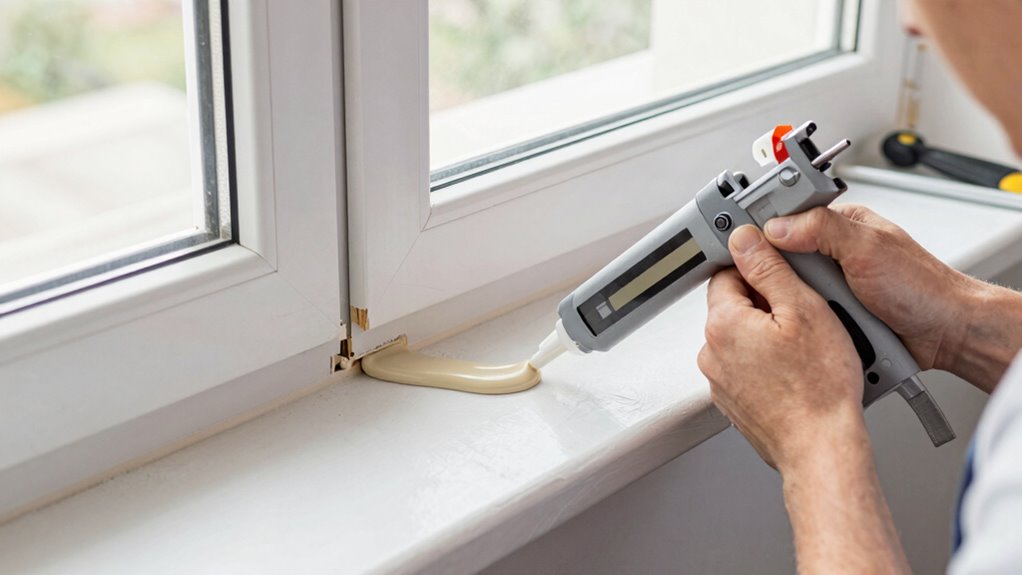
How to Apply Caulk Step-by-Step for a Professional Finish
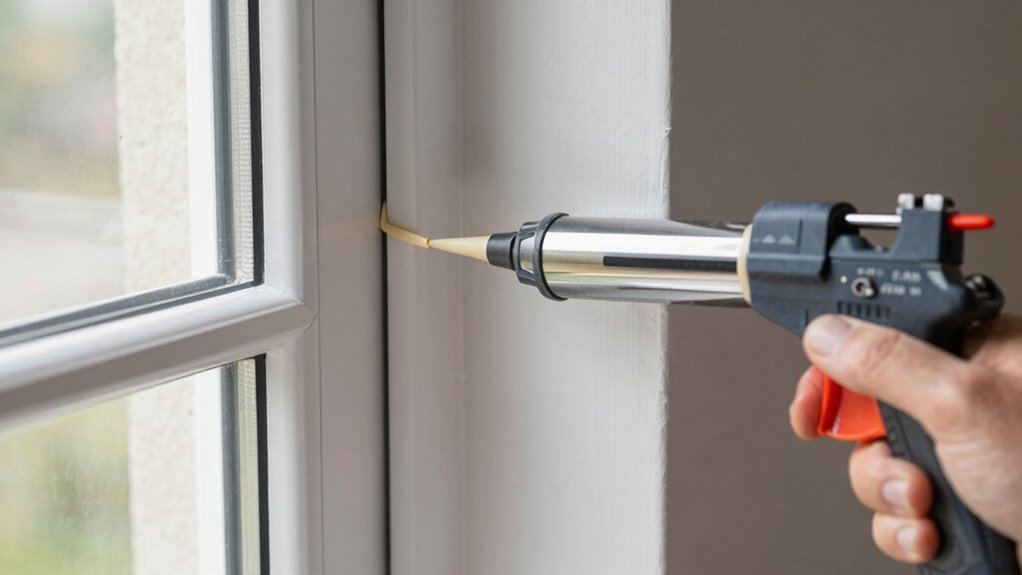
Applying caulk with precision is key to achieving a clean, professional finish. To do this, follow these steps for the best results:
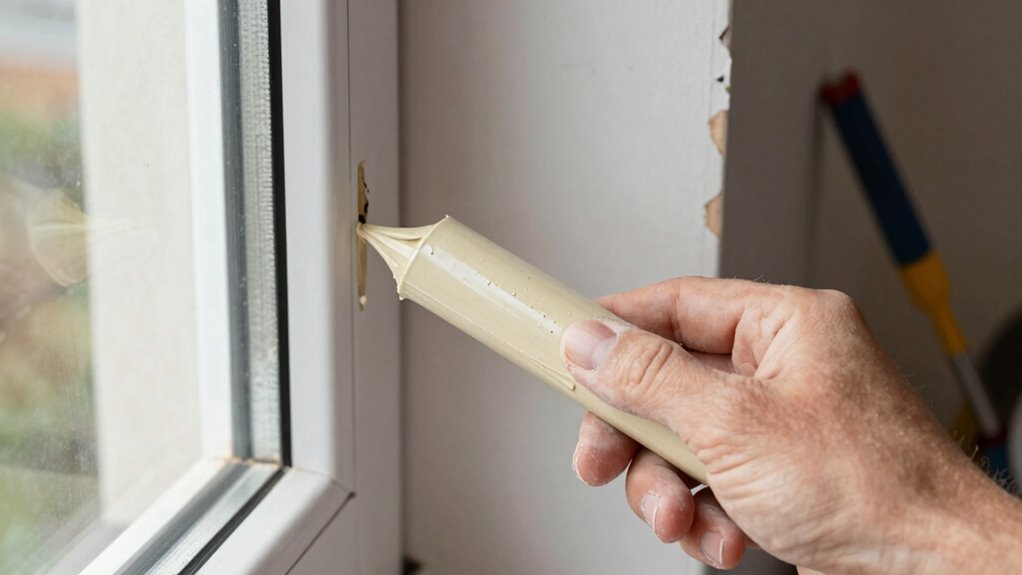
- Cut the tip at a 45-degree angle for better control.
- Load the caulk into a caulking gun, ensuring steady pressure.
- Apply a steady, continuous bead along the gap.
- Use caulking tips to maintain consistent speed and pressure.
- Keep a damp cloth nearby to wipe away excess immediately.
- Smart furniture like ladder racks and smart beds can help organize your space efficiently, reducing the need for excessive caulking around cluttered areas.
These professional techniques help create smooth, even lines. Remember, caulking tips like maintaining a steady hand and working in a single motion make a big difference. Practicing these steps ensures your caulking looks clean and neat, with no gaps or messes. With patience and precision, you’ll master the art of professional-looking caulk lines.
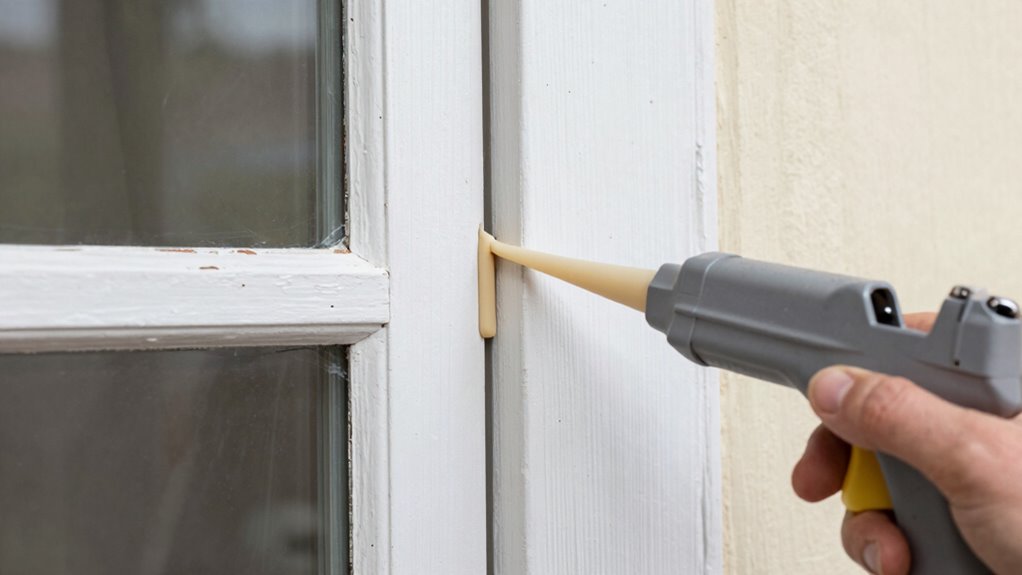
Tips for Smoothing and Finishing Your Caulk Line
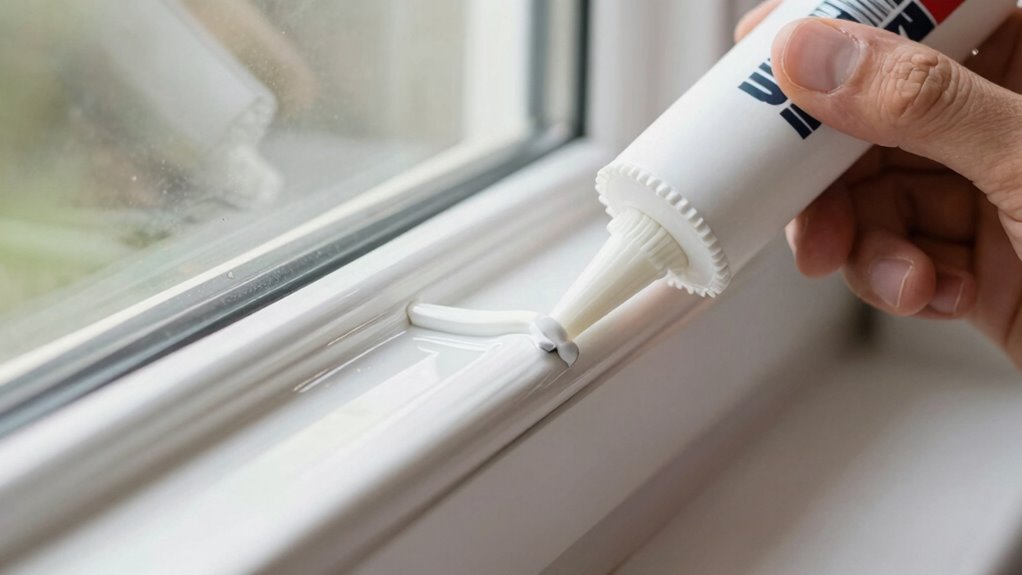
Smoothing and finishing your caulk line is essential for a polished look, and doing so promptly helps prevent the caulk from skinning over. To achieve smooth results, use a caulk finishing tool or a damp finger to shape the line. This ensures the caulk adheres evenly and fills gaps seamlessly. Different caulk textures, like silicone or acrylic, may require specific finishing techniques for best results. Understanding how contrast ratio affects image quality can also help you achieve a professional, seamless finish in your projects.
When and How to Replace Old Caulk
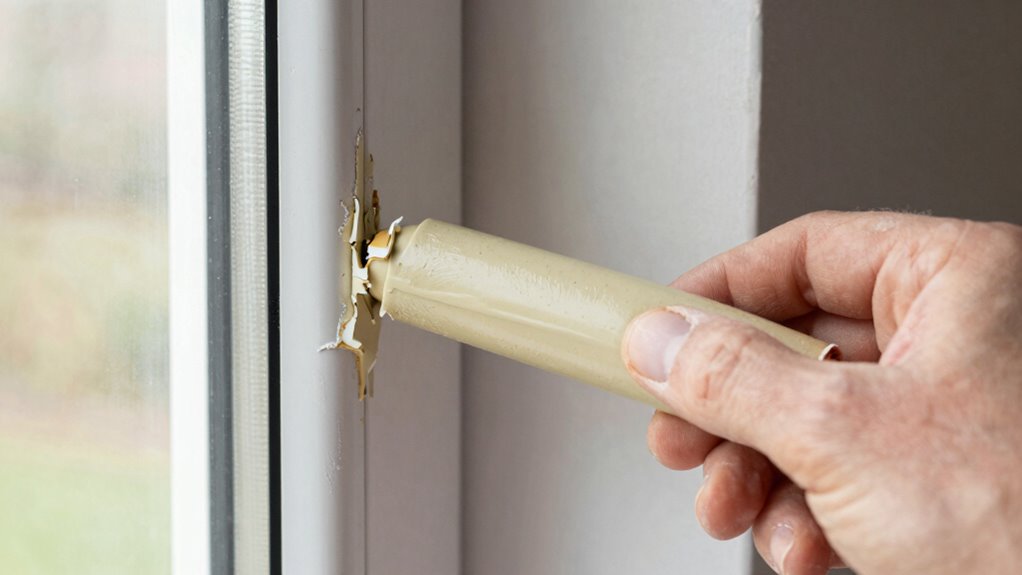
Knowing when to replace old caulk is key to maintaining a weatherproof and clean finish around your home. Caulk longevity varies but generally lasts 5-10 years, depending on exposure and quality. Recognize signs that indicate it’s time for replacement:
- Cracking or peeling
- Gaps or holes appearing
- Mold or mildew growth
- Loss of flexibility
- Discoloration or chalkiness
Don’t wait until leaks or drafts occur—timely replacement ensures your home stays protected. When replacing, remove the old caulk completely, clean the surface thoroughly, and apply fresh, smooth caulk for best results. Proper replacement timing keeps your caulking effective and your home energy-efficient. Regular inspections help you stay ahead of deterioration and maintain a professional finish. Monitoring caulk condition can help prevent costly repairs and improve overall home efficiency.
Common Caulking Mistakes and How to Avoid Them
Many homeowners make common mistakes when caulking that can compromise the seal and durability of their work. One frequent error is applying caulk in poor conditions, like in cold or humid weather, which leads to poor adhesion. Another is rushing through the process, resulting in uneven, incomplete joints. Additionally, some people make common application errors, such as over- or under-applying caulk, which affects the seal. Incorrect caulk selection is also a problem—using the wrong type for your specific needs can cause gaps or cracking over time. To avoid these mistakes, prepare the surface thoroughly, choose the right caulk for your project, and apply it smoothly in a steady, controlled manner. Proper technique guarantees a tight, long-lasting seal. Understanding sound vibrations can also help you recognize the importance of a proper seal in maintaining your home’s comfort and health.
Essential Tools and Accessories for Successful Caulking

To achieve a professional and long-lasting caulk job, you need the right tools and accessories on hand. Proper caulking tools streamline the process and guarantee clean, even results. Essential sealant accessories help you prepare and finish effectively. Consider these key items:
- Caulking gun for controlled application
- Utility knife for trimming caulk and cleanup
- Silicone or caulk smoothing tools for neat lines
- Painter’s tape to protect surrounding surfaces
- Rags and mineral spirits for cleaning excess caulk
Having these tools and sealant accessories ready makes the job easier and more precise. They help you achieve a smooth, professional finish while reducing mess and waste. Investing in quality caulking tools ensures your effort results in durable, effective sealing.
Troubleshooting Caulking Problems and FAQs
Caulking problems are common but often easily fixable with the right troubleshooting steps. If your caulk isn’t adhering properly, make sure you’ve prepared the surface thoroughly and used the correct type of caulk. For issues like cracking or peeling, remove the old caulk carefully, following caulking safety guidelines to avoid injury. When applying new caulk, smooth it with a damp finger or caulk tool for a neat finish. Remember, proper caulk disposal is essential—never toss leftover or unused caulk in regular trash; check local regulations for safe disposal methods. If you experience persistent problems, revisit your surface prep or consider environmental factors like temperature or humidity, which can affect adhesion. Addressing these common issues helps ensure your caulking lasts longer and performs better.
Frequently Asked Questions
How Long Does Caulk Typically Last Before Needing Replacement?
The caulk lifespan usually ranges from five to ten years, depending on the type and exposure. You should plan for replacement around the five-year mark if it’s in a high-traffic or outdoor area, as it may degrade faster. Regularly inspect your caulk for cracks or gaps, and replace it promptly when you notice deterioration to maintain an effective seal and prevent drafts or water leaks.
Can I Use Caulk Outdoors in All Weather Conditions?
Yes, you can use caulk outdoors in all weather conditions if it has good weather resistance. Look for products specifically designed for outdoor use, which handle extreme temperatures and moisture. confirm the caulk is compatible with your materials, like siding or trim, to prevent cracking or peeling. Properly apply it when surfaces are dry, and follow manufacturer instructions to maximize durability and performance in various weather conditions.
Is There Eco-Friendly or Low-Voc Caulk Available?
Yes, there are eco-friendly options and low VOC formulations available for caulk. You can choose products made with natural or less harmful ingredients that emit minimal volatile organic compounds, making them safer for you and the environment. Look for labels indicating low VOC or eco-friendly certifications. These options work just as well outdoors, providing effective sealing while reducing indoor air pollution and environmental impact.
How Do I Remove Old Caulk Effectively Without Damaging Surfaces?
Removing old caulk can feel like peeling away layers of history, but with the right caulk removal methods, you can do it without damaging surfaces. Start by softening the caulk with a heat gun or caulk remover, then gently scrape with a plastic putty knife. Use painter’s tape along edges for surface preservation techniques, preventing scratches. Always work carefully to keep your surfaces pristine and ready for fresh caulk.
What’s the Best Way to Store Leftover Caulk for Future Use?
To store leftover caulk, follow these caulk storage tips: clean the tip thoroughly, then seal the tube tightly with plastic wrap before replacing the cap. Store it in a cool, dry place to prevent it from drying out. Reusing leftover caulk is easy if you keep it airtight; just give it a good stir before applying again. This way, your caulk remains usable for future projects.
Conclusion
Think of caulking as sealing the cracks in a ship’s hull—it keeps water out and the journey smooth. When you properly caulk your windows and doors, you’re not just stopping drafts; you’re creating a cozy, energy-efficient home that saves you money. With patience and the right tools, you can master this simple task. So, grab your caulk and start sealing—your home will thank you for it!