TL;DR
A DIY project shared by C-A-L Ranch Stores turns eight matching milk crates into a multi-level bookshelf using cable ties and plywood inserts. The crate arrangement can be adapted, but the finished unit should be moved carefully and considered for wall anchoring to reduce tip-over risk.
A milk-crate bookshelf DIY from C-A-L Ranch Stores shows how to connect eight crates in a two-by-four arrangement, then add plywood inserts to create shelf bases. The project offers a low-complexity alternative to a premade bookcase, though the guide does not provide load limits or tested stability details.

Get the little things that make your day delivered free with Prime
- Fast, free delivery on millions of items
- Prime Video, Amazon Music and more included
- Member-only deals all year
The C-A-L Ranch Stores project calls for eight matching milk crates, cable ties and eight thin pieces of plywood. The guide says the wood should be cut to fit the inside dimensions of a crate and recommends measuring one crate before buying or cutting the panels. It also suggests looking for used crates through online marketplaces or asking local businesses, while noting that availability is not guaranteed.
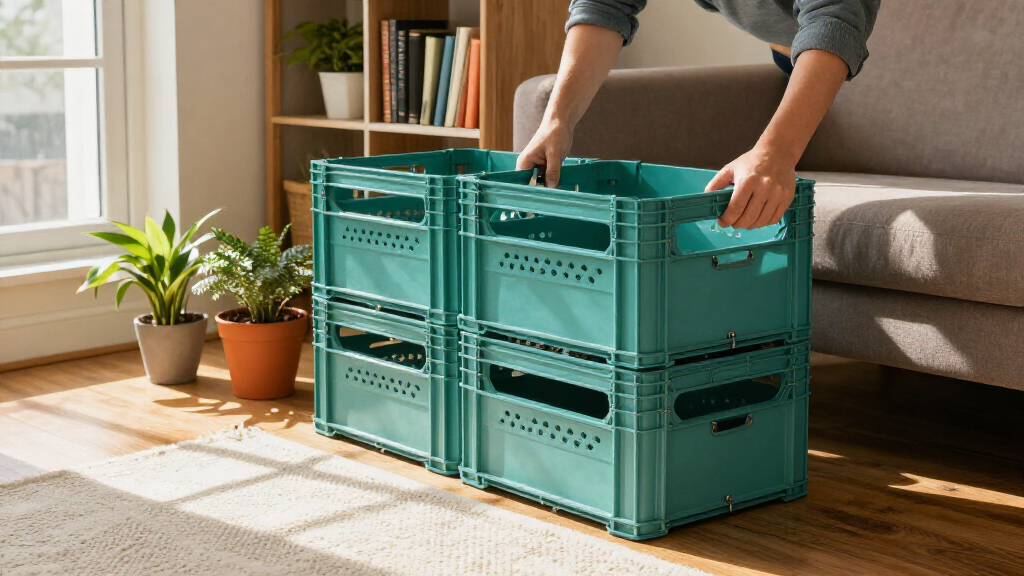
According to the guide, clean the crates if needed, then stack them with their openings facing forward in a two-crate-wide, four-crate-high layout for a vertical bookcase. It says the proportions can be reversed for a wider unit or fewer crates can be used. Once the stack is even, secure the crates to one another with multiple cable ties along each touching side, then trim the extra tie ends.
The instructions say to place a plywood piece inside each crate to make a base for its contents. A thin plywood panel can also be attached across the top for a flatter surface. The guide advises moving the assembled unit carefully and considering a wall anchor to help prevent tip-over accidents. It suggests using the crates for books, storage boxes, clothing, linens or records, with plants, framed photographs and other objects as display items.
Turn Milk Crates Into A Bookshelf
C-A-L Ranch Stores’ DIY guide turns matching crates into flexible storage. Plan for careful assembly and consider anchoring the finished unit.
Gather and measure
Use matching crates, cable ties and thin plywood cut to fit each crate interior.
Crates and ties
The ties join the crates; plywood inserts create a base inside each cubby.
Measure one crate
Check the interior dimensions before buying or cutting the plywood panels.
Build the frame
The guide’s example is two crates wide and four high, with openings facing forward.
Set the crates on an even surface; the layout can be adapted.
Use multiple cable ties along each touching side, then trim the ends.
Place a plywood panel inside each crate. A top panel is optional.
Customize the cubbies
- Books and records
- Boxes, clothing and linens
- Plants and framed photographs
- Trays, tiles or shallow baskets
Check safety and capacity
The guide gives no weight rating or stability test, so capacity depends on the crates, ties, assembly and placement.
- Move the assembled unit carefully.
- Inspect the unit before loading it.
- Consider a wall anchor and follow its hardware instructions.
A Bookcase From Reused Crates
The C-A-L Ranch Stores project presents a way to turn existing plastic crates into storage furniture rather than buying a conventional bookcase. That may appeal to readers looking for a flexible setup: the guide says the number and orientation of the crates can change, and the open cubbies can serve both storage and display purposes.
The DIY guide also notes that a quick assembly does not remove the need to think about safety. A stacked piece of furniture can tip, and the instructions recommend considering wall anchoring. The guide does not provide a weight rating, so readers should not assume that every crate or tie arrangement is suitable for heavy loads.
Products Worth Considering

Samsung 65-Inch S90H OLED 4K Smart TV Bundle with HW-B630F Soundbar, Subwoofer, and Screen Cleaner (2026)

Shark Pet Cordless Stick Vacuum, Up to 40-Minute Runtime, Grey, IX141

Roborock Q7 L5 Robot Vacuum and Mop Combo, 8,000 Pa Suction
As an affiliate, we earn on qualifying purchases.
Materials And Assembly Choices
The C-A-L Ranch Stores instructions use simple materials and do not call for specialized woodworking tools in the basic assembly. The main sizing step is fitting the plywood to the crate interiors; each cubby gets its own panel. The cable ties join the crates, while the inserts provide a surface for objects placed inside.
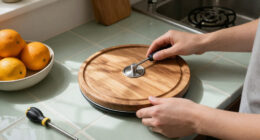
The guide suggests several ways to change the appearance. Plywood can be covered with contact paper, or trays, large books, tiles or shallow baskets can be used as crate-bottom coverings. Painting is another option; the guide notes that plastic generally needs light sanding before spray paint is applied. These are customization suggestions, not tested performance instructions.
Load Limits And Stability Unknown
The C-A-L Ranch Stores instructions do not specify the maximum weight the assembled bookcase can hold, the strength or dimensions of the crates, or how many cable ties are required at each joint beyond recommending multiple ties. The guide also does not describe a formal stability test. Results may depend on the crates, assembly and placement, so the instructions should not be read as a rated furniture design.
The guide does not make clear whether the plywood panels are intended to be fastened in place; its basic steps say to set them into the cubbies. It describes the optional top panel as something that could be screwed on. Readers will need to assess their own materials and use, and follow the instructions supplied with any wall-anchor hardware.
Plan The Build And Placement
For anyone considering the project, the C-A-L Ranch Stores guide recommends checking that the crates are similar in size and design, then measuring one interior to determine the plywood dimensions. The layout, number of crates and finish can be chosen before assembly. The guide’s steps are to clean the crates, stack them on an even surface, fasten the adjoining sides and trim the ties before inserting the panels.
Before filling the shelves, place the unit where it will be used and consider an appropriate wall anchor, as the guide advises. Since the instructions provide no load rating, they are not a guarantee that the bookcase can support a particular weight. Inspect the assembled unit and its attachment before adding books or other belongings.
Key Questions
How many milk crates does the project use?
The C-A-L Ranch Stores example uses eight matching crates, arranged two across and four high. The instructions also say the orientation can be reversed or fewer crates can be used.
What supplies are needed?
The guide lists milk crates, cable ties and thin plywood pieces sized to fit inside the crates. A thin plywood top is optional.
How are the crates connected?
The guide says to stack the crates with their openings facing forward, then use multiple cable ties along each touching side. Trim the excess ends after securing the joints.
Can the finished bookshelf be painted?
The guide says painting is an option and notes that plastic usually needs light sanding before spray paint is applied. It does not provide a specific paint product or durability test.
How much weight can the bookshelf hold?
The instructions do not give a weight limit or report stability testing. Capacity will depend on the crates and assembly, and the guide recommends considering a wall anchor to reduce tip-over risk.
Source: hunker.com