
TL;DR
A tutorial from The Transformation Studio shows how to reuse clear CD case fronts as panels for a faux stained-glass lampshade. The panels are outlined with craft paint, colored with tinted glue or plastic-compatible stained-glass paint, then assembled around a cardboard base; the shade should be lit only with LEDs because heat from halogen bulbs can melt the plastic.
The Transformation Studio has demonstrated a way to reuse the clear fronts of old CD cases as panels for a faux stained-glass lampshade. The project combines plastic panels, colored glue or glass paint and a cardboard frame, with LED lighting recommended because heat from halogen bulbs can melt the plastic.

Get the little things that make your day delivered free with Prime
- Fast, free delivery on millions of items
- Prime Video, Amazon Music and more included
- Member-only deals all year
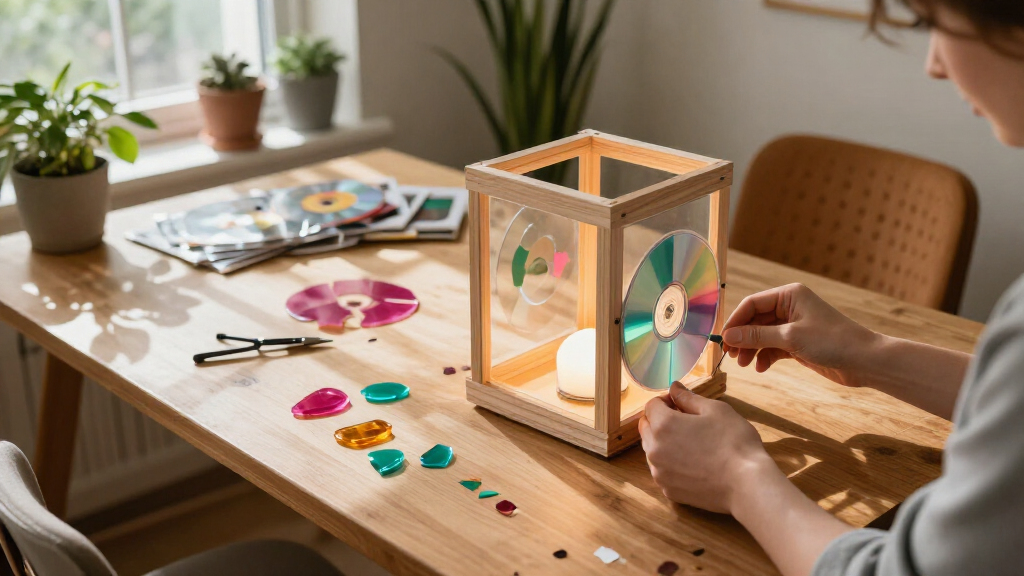
The design starts with the clear front panels removed from jewel CD cases. Two panels are glued together to make each side, producing four rectangular pieces for a box-shaped shade. Once the glue dries, each piece is laid over a pattern and its lines are traced with puffy craft paint or Gallery Glass Liquid Leading. The raised outlines separate the colored sections and give the finished panels a leaded-glass effect.
For color, the tutorial describes mixing gel food coloring into clear glue and applying the mixture inside the outlined shapes. A pattern can be drawn by hand, adapted from a printed image using tracing paper, or taken from a stained-glass pattern book. The guidance suggests outlining the design in marker and sketching the individual sections in pencil first, so shapes can be adjusted before the panels are painted.
After the colored sections dry, the panels are attached to a square cardboard base with hot glue to form a rectangular prism. Painted cardboard strips can cover the edges, while wooden beads may be added underneath as feet. The tutorial also notes that the glue-and-food-coloring method limits the available colors; stained-glass paints offer another option, provided the product is compatible with plastic.
Old CD Cases, New Glow A Faux Stained Glass Lamp
Clear jewel case fronts become colorful shade panels with craft paint, tinted glue and cardboard. The finished shade should use a cool-running LED light.
Build the panels
Two clear fronts are glued together for each side, making four rectangular pieces for a box-shaped shade.
Draw a design, trace an image or use a stained-glass pattern book.
Trace the pattern with puffy craft paint or liquid leading.
Fill sections with tinted clear glue or stained-glass paint labeled for plastic.
Assemble the shade
Let the panels dry before attaching them to the base.
Cardboard base
Hot-glue the panels around a square cardboard base to form a rectangular shade.
Cover the edges
Painted cardboard strips can hide joins; wooden beads may serve as feet.
Choose materials
Tinted glue offers limited colors. Check paint labels for plastic compatibility.
Choose a safe light
The case fronts may be polystyrene, and heat can melt the plastic.
- LED bulbs
- Battery-powered LED lights
- Flameless candles or string lights
- Halogen bulbs
- Any hot bulb near the plastic shade
A Second Use for Jewel Cases
The project offers a practical reuse for unused CD cases that might otherwise be discarded, turning a familiar household item into a decorative shade. It also relies on accessible craft supplies such as cardboard, clear glue and food coloring, although the finished result depends on careful assembly and enough drying time.
Lighting safety is a key limitation, not a minor finishing detail. The case fronts are generally made from polystyrene plastic, according to the project guidance, and halogen bulbs produce heat that can melt it. The proposed alternatives are LED bulbs, battery-powered LED lights, flameless candles or string lights; the shade is not presented as suitable for a hot bulb.
Products Worth Considering

Sony BRAVIA XR8B 65-Inch OLED 4K HDR Smart Google TV (K-65XR8B)

Ring Wired Doorbell Pro (3rd Gen) and Indoor Cam Plus Bundle, White

Dyson Cyclone V10 Origin Cordless Vacuum
As an affiliate, we earn on qualifying purchases.
From Music Cases to Craft Panels
Jewel cases were commonly used to store CDs, and households may still have stacks left over as music listening has shifted toward streaming. The tutorial reframes the transparent covers as small, ready-made plastic panels that can be decorated and joined together, rather than treating the cases as a single object.
The design borrows the visual language of stained glass without using glass: dark raised lines define the shapes, while translucent color fills them. A pattern book or a traced image can help plan the composition, but the project does not require a specific template. The maker can decide how many shapes and colors to include, within the limits of the chosen paint or tinted-glue method.
“The clear fronts of old CD cases can be used to create faux stained glass and assembled into a rectangular DIY lampshade.”
— The Transformation Studio
Material and Assembly Limits
The tutorial does not specify dimensions, drying times or glue quantities, so the number of cases and the time required will depend on the chosen pattern and materials. It also does not provide testing details for particular plastic paints or adhesives. Because the case fronts may be polystyrene, makers need to check the product label for plastic compatibility rather than assume every stained-glass paint will adhere.
The finished shade is described as a craft project, but no electrical fixture, bulb wattage or formal safety testing is specified. The instructions recommend LED options and warn against halogen heat; they do not establish that the cardboard-and-plastic shade is suitable for every lamp base or installation.
Choose a Pattern and LED
Anyone attempting the project can begin by collecting enough intact CD cases, selecting or drawing a pattern, and checking that the paint and glue are suitable for the plastic. The panels need to be assembled and allowed to dry before coloring and final construction, though the tutorial gives no fixed schedule.
Before using the finished shade, choose a cool-running LED source such as a battery-powered light or compatible string lights, and avoid halogen bulbs. No later update or product test is specified; the next steps depend on the maker’s chosen materials and design.
Source: rss
Key Questions
What parts of the CD case are used?
The project uses the clear front panels removed from jewel cases. Two panels are glued together for each side of the shade.
How do you add color to the panels?
The tutorial describes mixing gel food coloring with clear glue, then filling the shapes outlined with puffy craft paint or liquid leading. Stained-glass paint is another option, but it should be labeled as compatible with plastic.
Can the lampshade be used with a halogen bulb?
No. The project guidance warns that halogen bulbs get hot and can melt the plastic. It recommends LEDs, battery-powered lights, flameless candles or string lights instead.
What holds the finished panels together?
The panels are hot-glued to a square cardboard base to make a rectangular shade. Painted cardboard strips can cover the edges, and wooden beads can be added as feet.
Source: hunker.com